
NOTE
The intake air pressure sensor #1 is the same part as the intake air pressure sensor #2.
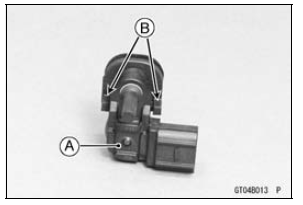
Position the intake air pressure sensor #1 [A] between the projections [B] on the rubber damper.

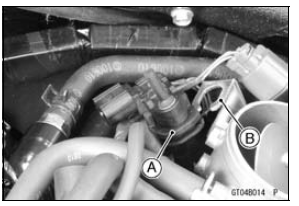
Install the rubber damper [A] on the bracket [B] as shown in the figure.

 Intake Air Pressure Sensor #1 Removal
 Intake Air Pressure Sensor #1 Input Voltage Inspection
Caliper Installation
Install the caliper and brake hose lower end.
For the front caliper, be sure to install the collars [A].
Replace the washers on each side of hose fitting with new
ones.
Touch the brake hoses [A] to the stopper [B] of the caliper.
Front Calipers [C]
Rear Caliper [D]
Tighten:
To ...
Wear Inspection
Remove the left front footpeg bracket
bolts.
A. Front Footpeg Bracket
B. Bolts
Remove the bolts and chain cover.
A. Bolts
B. Chain Cover
Stretch the chain taut either by using
the chain adjusters, or by hanging a
10 kg (22 lb) weight on the chain.
Measure the lengt ...
Operating Procedures
Clean the seat area carefully.
Coat the seat with machinist’s dye.
Fit a 45° cutter into the holder and slide it into the valve
guide.
Press down lightly on the handle and turn it right or left.
Grind the seating surface only until it is smooth.
NOTICE
Do not grind the seat too ...