
If the oil filter holder bolt [A] was removed, tighten it.
Apply a non-permanent locking agent to the threads of the oil filter holder bolt.
Torque - Oil Filter Holder Bolt: 35 N·m (3.6 kgf·m, 26 ft·lb)
Blow away the particles by applying compressed air [B] from the inside to the outside (from the clean side to the dirty side).
| WARNING Gasoline and low flash-point solvents can be flammable and/or explosive and cause severe burns. Clean the screen in a well-ventilated area, and take care that there are no sparks or flame anywhere near the working area; this includes any appliance with a pilot light. Do not use gasoline or a low flash-point solvent to clean the screen. |
NOTE
While cleaning the oil screen, check for any metal particles that might indicate internal engine damage.
If the screen is damaged, replace it.
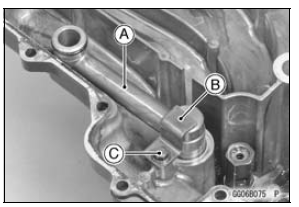
Face the flanged side [B] to the bottom.
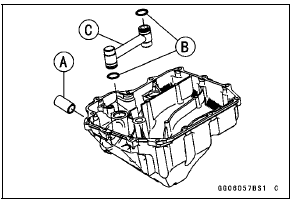
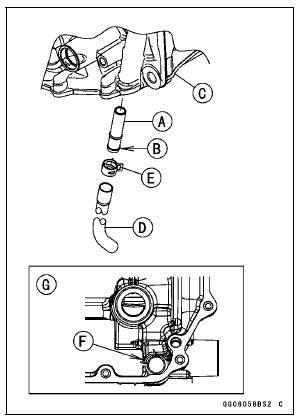
Lower Crankcase [C]
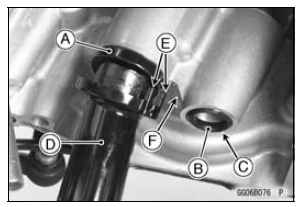
Face the knob of the clamp [F] inward as shown in the figure.
Viewed from Bottom [G]
Turn the chamfered side [C] downward.
Fit the claws [E] to the crankcase rib [F].
Torque - Oil Pan Bolts: 9.8 N·m (1.0 kgf·m, 87 in·lb)
Front [D]
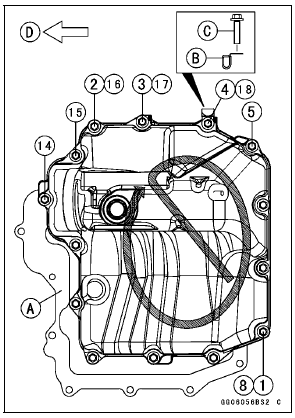
 Oil Pan Removal
Safe riding technique
The points given below are applicable for everyday motorcycle use and
should
be carefully observed for safe and effective vehicle operation.
For safety, eye protection and a
helmet are strongly recommended.
You should be aware of and verify
the applicable safety regulations in
force prior ...
Throttle Control System Inspection
Check the throttle grip free play [A].
If the free play is incorrect, adjust the throttle cables.
Throttle Grip Free Play
Standard: 2 3 mm (0.08
0.12 in.)
Check that the throttle grip [B] moves smoothly from full
open to close, and the throttle closes quickly and completely
by the ...
Front Fork Inspection
Holding the brake lever, pump the
front fork up and down several times
to inspect smooth stroke.
Visually inspect the front fork for oil
leakage, scoring or scratches on the
outer surface of the inner tube.
If any doubt about the front fork, it
should be checked by an authorized
K ...
