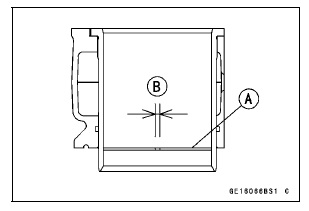

Piston Ring End Gap Standard:
Top 0.20  0.30 mm (0.0079
 0.0118 in.)
Second 0.35  0.50 mm (0.0138
 0.0197 in.)
Service Limit: Top 0.6 mm (0.024 in.)
Second 0.8 mm (0.031 in.)
If the end gap of either ring is greater than the service limit, replace all the rings.

 Piston Ring Thickness Inspection
 Balancer
Before Servicing
Before starting to perform an inspection service or carry out a disassembly
and reassembly operation
on a motorcycle, read the precautions given below. To facilitate actual
operations, notes, illustrations,
photographs, cautions, and detailed descriptions have been included in each
chapter w ...
Specifications
Connecting Rod Big End Bearing Insert Selection
Crankshaft Main Bearing Insert Selection
*: The bearing inserts for Nos. 2 and 4 journals have an oil groove,
respectively. ...
Fuel Level Warning Indicator Light
: The fuel level warning
indicators
are activated when approximately 3.8 L
(1.0 US gal) of fuel remains as follows:
For models without KIBS:
A. Fuel Level Warning Indicator Light
B. “FUEL” Indication
The fuel level warning indicator light
( ) goes
on and “FUEL” blinks in the
...