
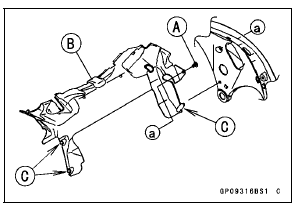
Clear the projections [C] from the main frame.
 Charging System
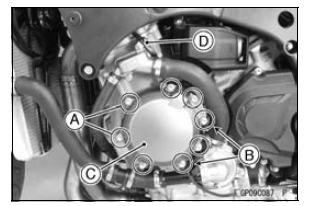
 Alternator Cover Installation
Keys
This motorcycle has a combination
key, which is used for the ignition
switch, steering lock, seat lock, and
fuel tank cap.
Included with the key is a key number,
which may be stamped on a separate
plate. Record the key number in
the space provided and store the number
in a safe place. If y ...
Special Tools and Sealant
Oil Pressure Gauge, 10 kgf/cm²:
57001-164
Oil Pressure Gauge Adapter, PT3/8:
57001-1233
Outside Circlip Pliers:
57001-144
Liquid Gasket, TB1211:
56019-120
...
Sprocket Wear Inspection
Visually inspect the engine and rear sprocket teeth for
wear and damage.
If the teeth are worn as illustrated, replace the sprocket,
and inspect the drive chain wear (see Drive Chain Wear
Inspection in the Periodic Maintenance chapter).
Worn Tooth (Engine Sprocket) [A]
Worn Tooth (Rear ...