
NOTICE
Brake fluid quickly ruins painted plastic surfaces; any spilled fluid should be completely washed away immediately.

Take care not to spill the brake fluid on the painted or plastic parts.
Temporarily secure the end of the brake hose to some high place to keep fluid loss to a minimum.
Immediately wash away any brake fluid that spills.
Replace them with new ones.
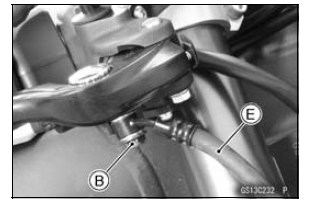
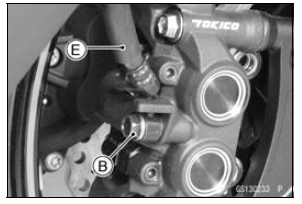
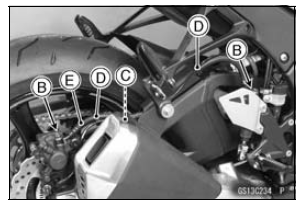
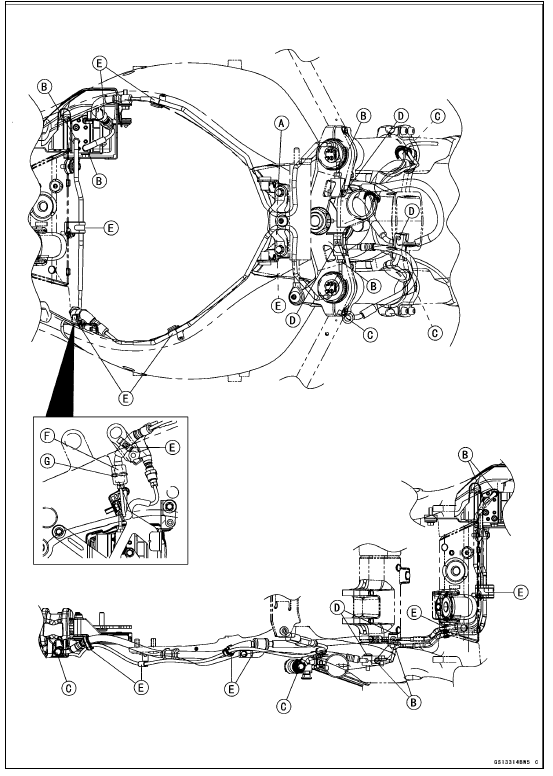
Torque - Brake Hose Banjo Bolts: 25 N·m (2.5 kgf·m, 18 ft·lb)
NOTE
When removing the brake pipes and hoses on the hydraulic unit, remove them according to each assembly of the exploded view in the Brakes chapter.
If there is any damage, replace the damaged parts with new ones.
NOTE
Tighten the brake pipe joint nuts at both ends of the brake pipe temporarily and then tighten them to the specified torque.
Torque - Brake Hose Banjo Bolts: 25 N·m (2.5 kgf·m, 18 ft·lb) Brake Pipe Joint Nuts: 18 N·m (1.8 kgf·m, 13 ft·lb)
 Oil Filter Replacement
 Brake Fluid Change
Crankshaft Sensor Removal
Remove:
Fuel Tank (see Fuel Tank Removal in the Fuel System
(DFI) chapter)
Crankshaft Sensor Lead Connector [A]
Remove:
Right Lower Fairing (see Lower Fairing Removal in the
Frame chapter)
Bolts [A]
Crankshaft Sensor Cover [B] and Gasket
Oil Pressure Switch Terminal [C]
...
Balance Weight Installation
Check if the weight portion has any play on the blade [A]
and clip [B].
If it does, discard it.
WARNINGUnbalanced wheels can create an unsafe
riding
condition. If the balance weight has any play on
the rib of the rim, the blade and/or clip have been
stretched. Replace th ...
Spark Plugs
The standard spark plug is shown in
the table. The spark plugs should be
replaced in accordance with the Periodic
Maintenance Chart.
Spark plug removal should be done
only by a competent mechanic following
the instructions in the Service Manual.
Spark Plug
A. Plug Gap ...