
NOTE
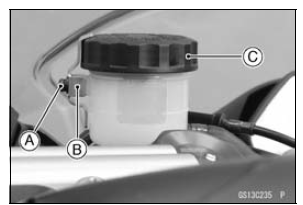
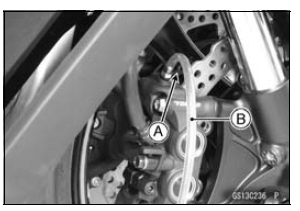
The procedure to change the front brake fluid is as follows.
Changing the rear brake fluid is the same as for the front brake.

Level the brake fluid reservoir.


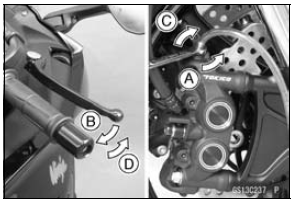
Repeat this operation until fresh brake fluid comes out from the plastic hose or the color of the fluid changes.
1. Open the bleed valve [A].
2. Apply the brake and hold it [B].
3. Close the bleed valve [C].
4. Release the brake [D].
NOTE
Remove the clear plastic hose.
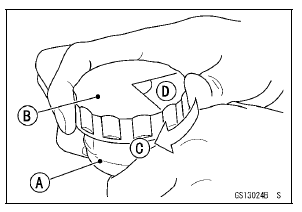
Install the diaphragm and reservoir cap.
Follow the procedure below to install the front/rear brake fluid reservoir cap correctly.

Torque - Front Brake Reservoir Cap Stopper Screw: 1.2 N·m (0.12 kgf·m, 11 in·lb)
Torque - Bleed Valves: 7.8 N·m (0.80 kgf·m, 69 in·lb)
If necessary, bleed the air from the lines.
 Brake Hose and Pipe Replacement
 Master Cylinder Rubber Parts Replacement
Hub Bearing Inspection
Since the hub bearings are made to extremely close tolerances,
the clearance can not normally be measured.
NOTE
Do not remove any bearings for inspection. If any bearings
are removed, they will need to be replaced with
new ones.
Turn each bearing in the hub back and forth [A] while
checki ...
Moving Off
Check that the side stand is up.
Pull in the clutch lever.
Shift into 1st gear.
Open the throttle a little, and start to
let out the clutch lever very slowly.
As the clutch starts to engage, open
the throttle a littlemore, giving the engine
just enough fuel to keep it from
stallin ...
Rear Fender Front Removal
Remove:
Flap and Rear Fender Rear (see Flap and Rear Fender
Rear Removal)
Fuel Tank (see Fuel Tank Removal in the Fuel System
(DFI) chapter)
Battery (see Battery Removal in the Electrical System
chapter)
Exhaust Butterfly Valve Actuator (see Exhaust Butterfly
Valve Actuator Remova ...