
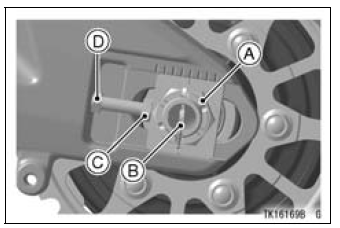
A. Axle Nut
B. Cotter Pin
C. Adjuster
D. Locknut
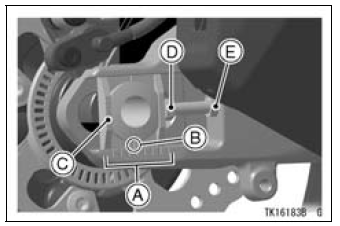
A. Marks
B. Notch
C. Indicator
D. Adjuster
E. Locknut
NOTE
Wheel alignment can also be checked using the straightedge or string method.
| WARNING Misalignment of the wheel will result in abnormalwear, andmay result in an unsafe riding condition. Align the rear wheel using the marks on the swingarm or measuring the distance between the center of the axle and swingarm pivot. |
Tightening Torque
NOTE
If a torque wrench is not available, this item should be serviced by an authorized Kawasaki dealer.
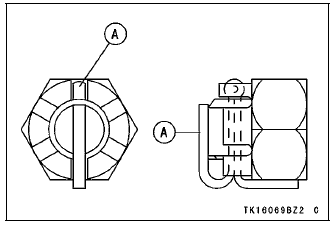
A. Cotter Pin
NOTE
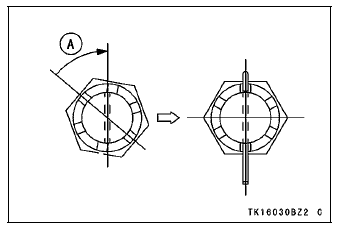
A. Turn Clockwise
| WARNING A loose axle nut can lead to an accident resulting in serious injury or death. Tighten the axle nut to the proper torque and install a new cotter pin. |
 Chain Slack Inspection
 Wear Inspection
Fuel Consumption
This display mode shows the fuel
consumption in Liter or Gallon by numerical
value counted from the start of
measuring to present time.
A. Fuel Consumption
B. “L”
While the fuel consumption is displayed,
push the lower button and
hold it in until the fuel consumption
values re ...
Parts Location
NOTE
The front and rear wheel rotation sensors and rotors are
standard parts of this motorcycle.
Front Wheel Rotation Sensor [A]
Front Wheel Rotation Sensor Rotor [B]
Rear Wheel Rotation Sensor [C]
Rear Wheel Rotation Sensor Rotor [D]
ABS Indicator Light (LED) [E]
KIBS Indicator Ligh ...
Exhaust Butterfly Valve Actuator Sensor Input Voltage Inspection
NOTE
Be sure the battery is fully charged.
Turn the ignition switch to OFF.
Remove the front seat (see Front Seat Removal in the
Frame chapter).
Remove the screws [A] and the exhaust butterfly valve
actuator temporarily with the cables installed.
Disconnect the exhaust butterf ...