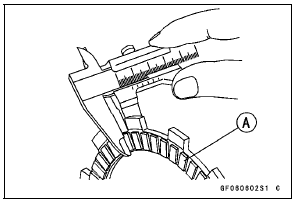

If any plates show signs of damage, or if they have worn past the service limit, replace them with new ones.

Friction Plate Thickness
Standard: 2.72  2.88 mm
(0.107  0.113 in.)
Service Limit: 2.5 mm (0.098 in.)
 Spring Plate Free Play Adjustment
 Clutch Plate Warp Inspection
Rear Shock Absorber Installation
Replace the rear shock absorber nuts and tie-rod nuts
with new ones.
Tighten:
Torque - Rear Shock Absorber Nuts: 34 N·m (3.5 kgf·m, 25
ft·lb)
Tie-Rod Nuts: 34 N·m (3.5 kgf·m, 25 ft·lb)
When installing the rear shock absorber bracket [A], install
it so that the recess side [B] ...
Precautions
1) No need of topping-up
No topping-up is necessary in this battery until it ends its life under
normal use. Forcibly prying
off the seal cap to add water is very dangerous. Never do that.
2) Refreshing charge.
Give refresh charge for 5 to 10 hours with charge current shown in the text
(see ...
Caliper Rubber Parts Replacement
Front Caliper Disassembly
Remove:
Front Caliper (see Front Caliper Removal in the Brakes
chapter)
Brake Pads (see Front Brake Pad Removal in the Brakes
chapter)
Remove:
Front Caliper Assembly Bolts [A]
Split the front caliper.
Remove:
Pad Spring
O-ring [A]
U ...