
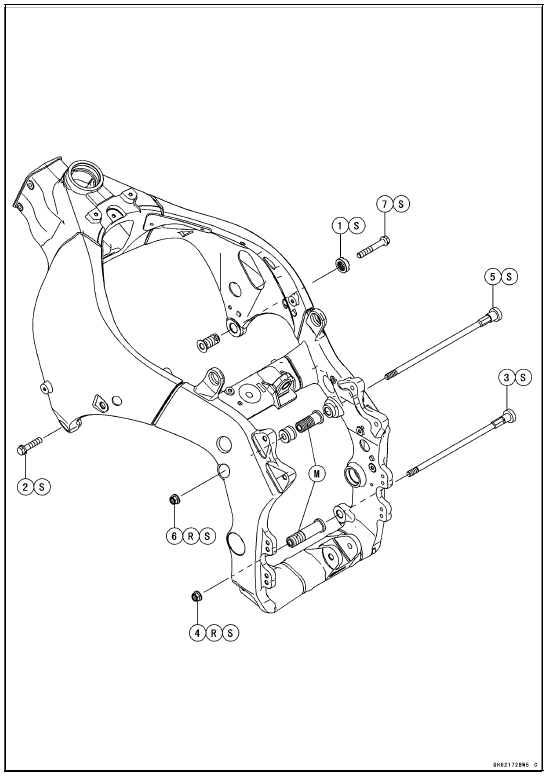
M: Apply molybdenum disulfide grease.
R: Replacement Parts
S: Follow the specified tightening sequence.
Special Tool
Engine Mount Nut Wrench:
57001-1450 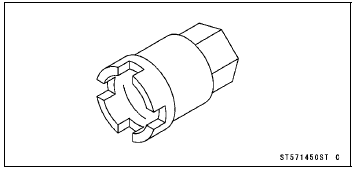
Exhaust Butterfly Valve Actuator Sensor Input Voltage Inspection
NOTE
Be sure the battery is fully charged.
Turn the ignition switch to OFF.
Remove the front seat (see Front Seat Removal in the
Frame chapter).
Remove the screws [A] and the exhaust butterfly valve
actuator temporarily with the cables installed.
Disconnect the exhaust butterf ...
KIBS Equipped Models
1. Clutch Cable
2. Vacuum Hose (Equipped Models)
3. Left Switch Housing Lead
4. Main Harness
5. Front Brake Hose
6. Throttle Cables
7. Right Switch Housing Lead
8. Bracket (Hold the brake pipes.)
9. Run the meter lead to outside of the meter bracket.
10. Run the vacuum hoses to inside o ...
Relay Circuit Inspection
Remove the relay box (see Relay Box Removal).
Check conductivity of the following numbered terminals
by connecting the hand tester and one 12 V battery to the
relay box as shown in the figure (see Relay Box Internal
Circuit in this section).
If the tester does not read as specified, re ...

