
Use the micrometer to measure at several points around the ring.
Piston Ring Thickness Standard:
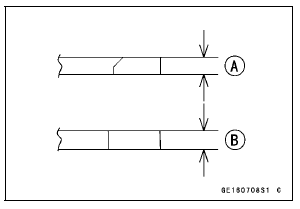
Top [A] 0.77  0.79 mm (0.0303
 0.0311 in.)
Second [B] 0.78  0.79 mm
(0.0307  0.0311 in.)
Service Limit:
Top 0.70 mm (0.0276 in.)
Second 0.71 mm (0.0280 in.)
If any of the measurements is less than the service limit on either of the rings, replace all the rings.
NOTE
When using new rings in a used piston, check for uneven groove wear. The rings should fit perfectly parallel to the groove sides. If not, replace the piston.
 Piston Ring Groove Width Inspection
 Piston Ring End Gap Inspection
Cleaning Vehicle before Disassembly
Clean the vehicle thoroughly before disassembly. Dirt or
other foreign materials entering into sealed areas during vehicle
disassembly can cause excessive wear and decrease
performance of the vehicle.
Arrangement and Cleaning of Removed Parts
Disassembled parts are easy to confuse. Arrange ...
Gear Position Switch Installation
Securely place the springs [A] and pins [B] into the holes
[C] of the shift drum.
Apply grease to the new O-ring [D].
Install the gear position switch [E].
Apply a non-permanent locking agent to the threads of
the gear position switch screws [F].
Tighten:
Torque - Gear Position Swit ...
Model Identification
ZX1000JB (US and CA Models) Left Side View
ZX1000JB (US and CA Models) Right Side View
ZX1000JB (EUR Models) Left Side View
ZX1000JB (EUR Models) Right Side View
ZX1000KB (US and CA Models) Left Side View
ZX1000KB (US and CA Models) Right Side View
ZX1000KB (EUR Models) ...