
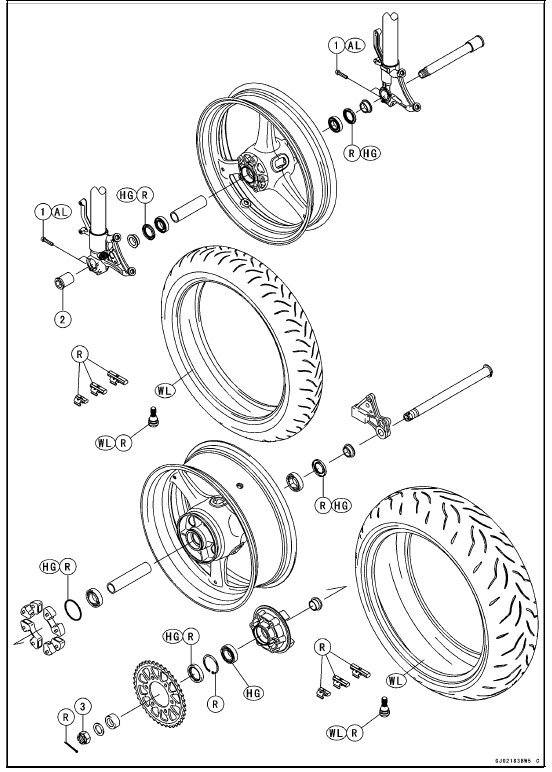

AL: Tighten the two clamp bolts alternately two times to ensure even tightening torque.
HG: Apply high-temperature grease.
R: Replacement Parts WL: Apply soap and water solution or rubber lubricant.
Specifications
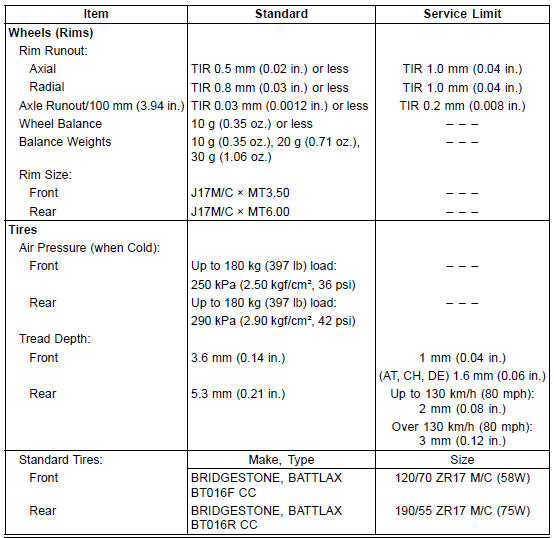
| WARNING Some replacement tires may adversely affect handling and cause an accident resulting in serious injury or death. To ensure proper handling and stability, use only the recommended standard tires for replacement, inflated to the standard pressure. |
 Wheels/Tires
 Special Tools
Engine Oil Change
Situate the motorcycle so that it is vertical after warming
up the engine.
Remove the engine oil drain bolt [A] to drain the oil.
The oil in the oil filter can be drained by removing the filter
(see Oil Filter Replacement).
Replace the drain bolt gasket [B] with a new one.
Tighten t ...
Air Intake Solenoid Valve Unit Test
Remove the air intake solenoid valve (see Air Intake Solenoid
Valve Removal in the Fuel System (DFI) chapter).
Set the hand tester [A] to the × 1 Ω range and connect it
to the air intake solenoid valve terminals as shown in the
figure.
Special Tool - Hand Tester: 57001-1394
...
Spark Plugs
The standard spark plug is shown in
the table. The spark plugs should be
replaced in accordance with the Periodic
Maintenance Chart.
Spark plug removal should be done
only by a competent mechanic following
the instructions in the Service Manual.
Spark Plug
A. Plug Gap ...