
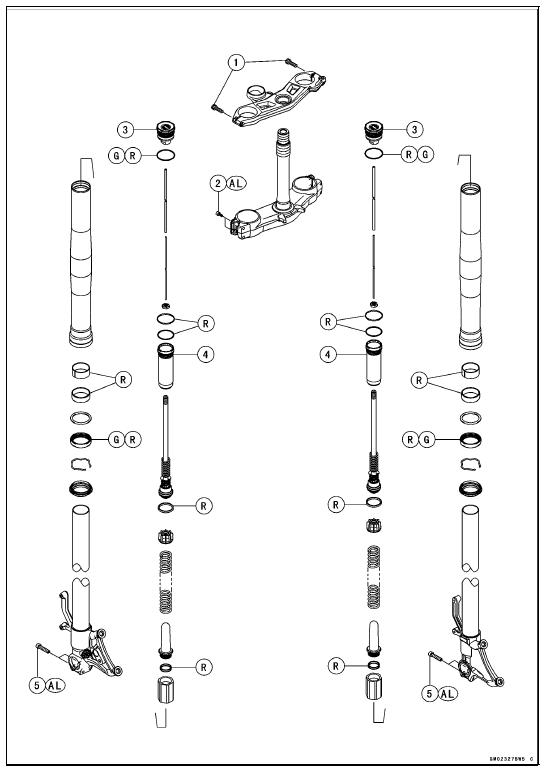

AL: Tighten the two clamp bolts alternately two times to ensure even tightening torque.
G: Apply grease.
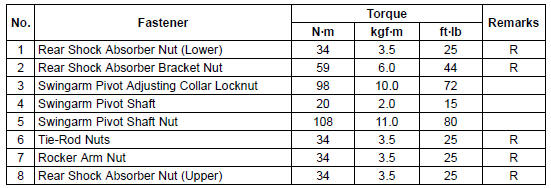
R: Replacement Parts

G: Apply grease.
L: Apply a non-permanent locking agent.
R: Replacement Parts
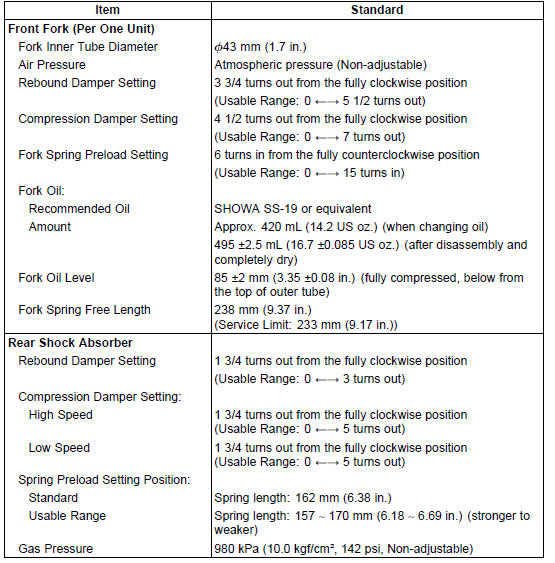
Specifications
 Suspension
 Special Tools
Electrical Leads
A two-color lead is identified first by the primary color and
then the stripe color. Unless instructed otherwise, electrical
leads must be connected to those of the same color.
Instrument
Use a meter that has enough accuracy for an accurate
measurement. Read the manufacture’s instructions ...
Check 2-3: Intake Air Temperature Inspection
Disconnect the intake air temperature sensor connector
[A] (see Intake Air Temperature Sensor Removal in the
Self-Diagnosis System chapter).
Connect the variable rheostat [B] to the R/BK lead [C] and
BR/BK lead [D] terminals.
Turn the ignition switch to ON.
Read the temperatur ...
Oil Pump Drive Gear Installation
Install is the reverse of removal. Note the following.
First, engage the oil pump chain [A] to the gears, and then
install the oil pump drive gear [B].
Turn the “OUT” mark [C] to outside.
Apply a non-permanent locking agent to the oil pump drive
chain guide bolt and the oil pump drive ...