
The yellow warning indicator light in the meter unit functions as the KIBS warning indicator light. The yellow warning indicator light and warning symbol “KIBS” go on if there is a malfunction in the KIBS system. When the warning light is on, the KIBS system stops functioning. However, the ABS still functions normally if the KIBS system fails.
If the yellow warning indicator light and warning symbol “KIBS” go on, you should have the KIBS system checked by an authorized Kawasaki dealer.
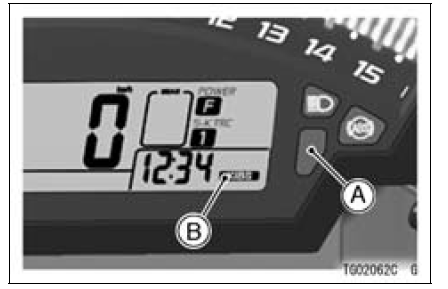
A. Yellow Warning Indicator light
B. KIBS Symbol
 Warning/Indicator Lights
 Electronic Steering Damper Warning Indicator Light
Front Seat Installation
Installation is the reverse of removal. Note the following.
Check that the dampers [A] are in place on the front seat.
Install the collars [B] as shown in the figure.
Place the seat hooks [A] under the fuel tank bracket [B].
...
Clutch Plate, Wear, Damage Inspection
Visually inspect the friction and steel plates for signs of
seizure, overheating (discoloration), or uneven wear.
Measure the thickness of each friction plate [A] at several
points.
If any plates show signs of damage, or if they have worn
past the service limit, replace them with new on ...
Stick Coil Input Voltage Inspection
NOTE
Be sure the battery is fully charged.
Turn the ignition switch to OFF.
Remove the ECU (see ECU Removal in the Fuel System
(DFI) chapter).
Do not disconnect the ECU connectors.
Connect a digital meter [A] to the connector [B] with the
needle adapter set.
Special Tool - N ...