
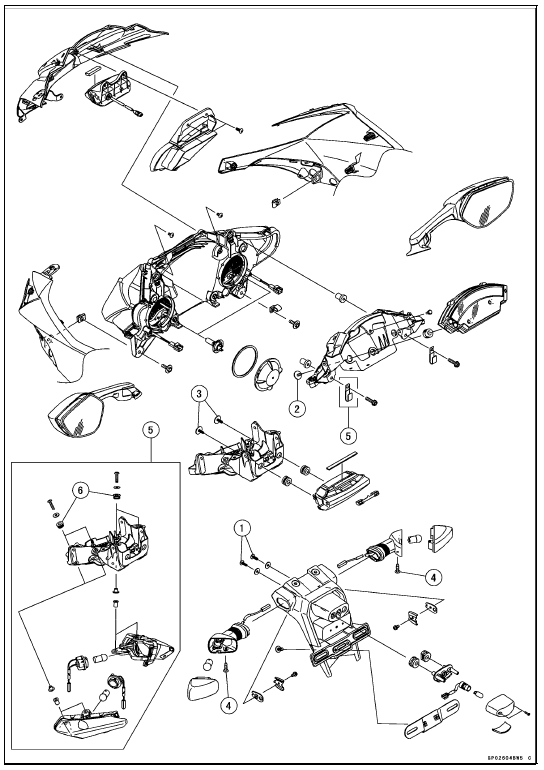
5. Other than US, CA, and CAL Models 6. The big diameter side of the dampers faces upward.
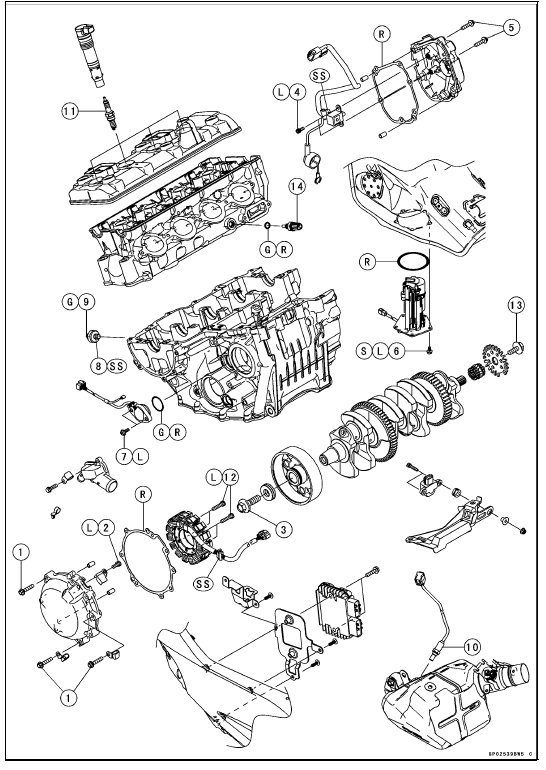
G: Apply grease.
L: Apply a non-permanent locking agent.
R: Replacement Parts S: Follow the specified tightening sequence.
SS: Apply silicone sealant.
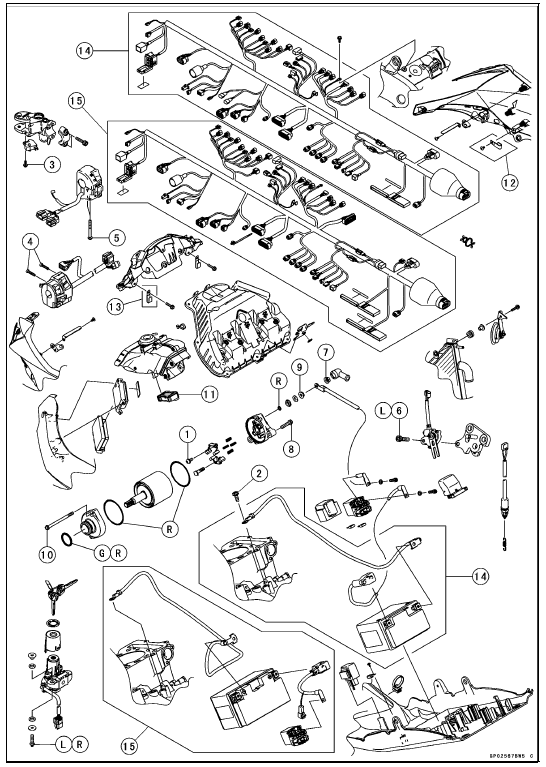
11. Immobilizer Amplifier (Equipped Models) 12. CAL and SEA-B1 Models
13. Other than US, CA and CAL Models
14. ZX1000J Model
15. ZX1000K Model
G: Apply grease.
L: Apply a non-permanent locking agent.
R: Replacement Parts
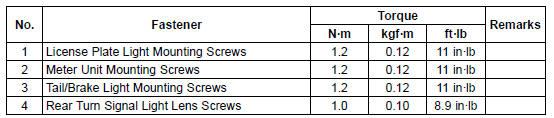
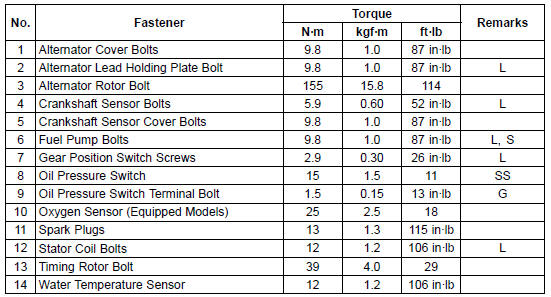
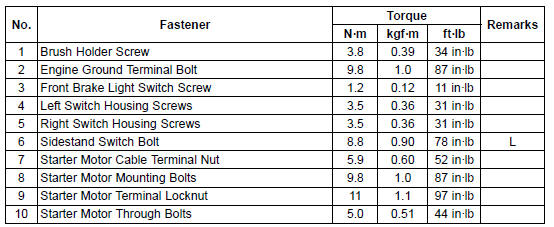
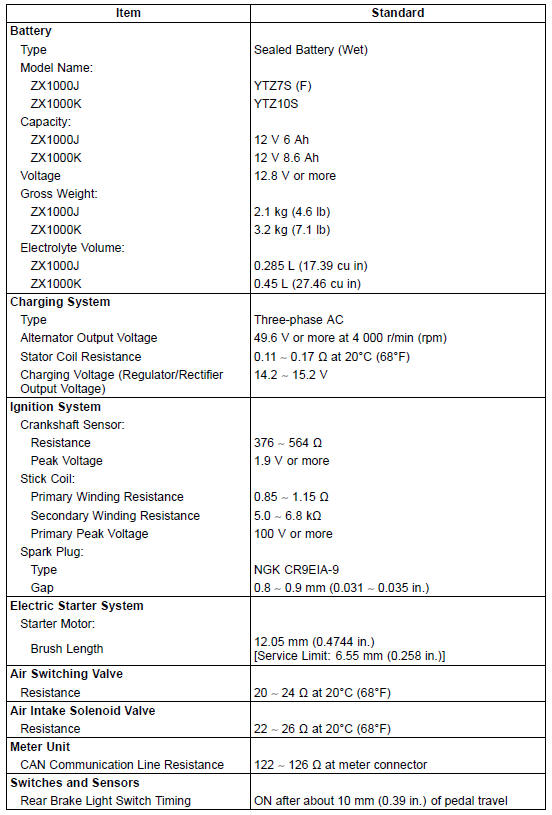
Specifications

 Special Tools and Sealant
Torque Limiter Installation
Apply molybdenum disulfide grease to the torque limiter
shaft [A].
Install the torque limiter [B], the collar [C] and the shaft.
Turn the large-hole end of the shaft to inside as shown in
the figure.
Replace the washer [D] with a new one.
Apply a non-permanent locking agent to the t ...
Premuffler Chamber Removal
Remove:
Muffler Body (see Muffler Body Removal)
Right Lower Fairing (see Lower Fairing Removal in the
Frame chapter)
Front Seat (see Front Seat Removal in the Frame chapter)
Oxygen Sensor (Equipped Models) (see Oxygen Sensor
Removal (Equipped Models) in the Electrical System
chapter ...
Front Master Cylinder Installation
Apply silicone grease to the sliding surface of the brake
lever pivot bolt.
Tighten:
Torque - Brake Lever Pivot Bolt: 1.2 N·m (0.12 kgf·m, 11
in·lb)
Brake Lever Pivot Bolt Nut: 5.9 N·m (0.60 kgf·m,
52 in·lb)
Assemble the reservoir [A] and the bracket [B] as shown
in the figu ...
