

NOTICE
Immediately wash away any brake fluid that spills.

 Master Cylinder
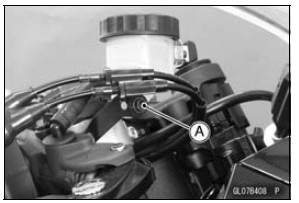
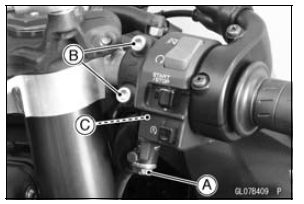
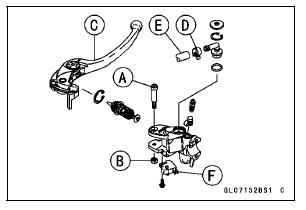
 Front Master Cylinder Installation
Shifting Gears
Close the throttle while pulling in the
clutch lever.
Shift into the next higher or lower
gear.
Open the throttle part way, while releasing
the clutch lever.
For smooth riding, each gear position
should cover the proper rate of speed
shown in the table.
WARNINGDownshifti ...
Fuel Flow Rate Inspection
WARNINGGasoline is extremely flammable and can be
explosive
under certain conditions, creating the
potential for serious burns. Make sure the area is
well-ventilated and free from any source of flame
or sparks; this includes any appliance with a pilot
light. Do not smoke. T ...
Intake Air Temperature Meter
Intake air temperature meter indicates
temperature of the air in the air
cleaner case.
The “Intake Air” is displayed if the intake
air temperature meter is selected.
A. Intake Air Temperature Meter
B. “Intake Air”
NOTE
The intake air temperature meter
shift to the coolant temp ...