
The yellow light functions as the electronic steering damper warning indicator.
The light and warning symbol "ESD" go on if there is a malfunction in the electronic steering damper system.
However, this could also be caused by trouble with the charging system (e.g.
battery). If the warning light comes on, check the battery to be sure it is fully charged. If the battery is fully charged and the warning light still goes on, have the electronic steering damper system checked by an authorized Kawasaki dealer.
The electronic steering damper system maintains the last damping force setting if it fails.
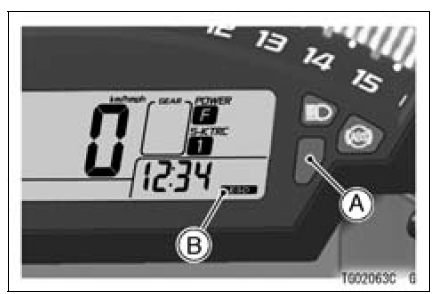
A. Yellow Warning Indicator Light
B. Electronic Steering Damper Warning Symbol
 KIBS Warning Indicator Light (For models equipped
with KIBS)
KIBS Warning Indicator Light (For models equipped
with KIBS) ABS Indicator Light (For models equipped with KIBS)
Valve Clearance Adjustment
To change the valve clearance, remove the camshafts
(see Camshaft Removal in the Engine Top End chapter)
and valve lifters.
Replace the shim with one of a different thickness.
NOTE
Mark and record the locations of the valve lifters and
shims so that they can be reinstalled in their ...
Flap and Rear Fender Rear Removal
Remove:
Front and Rear Seat (see Front/Rear Seat Removal)
Seat Covers (see Seat Cover Removal)
Vehicle-down Sensor Connector [A]
Screws [B]
Clear the seat lock cable [C] from the seat lock unit [D].
Take off the seat lock unit and the bracket.
Remove:
Bolts [A] (Both Sides ...
Fuel Pump Removal
WARNINGGasoline is extremely flammable and can be
explosive
under certain conditions, creating the
potential for serious burns. Make sure the area is
well-ventilated and free from any source of flame
or sparks; this includes any appliance with a pilot
light. Do not smoke. T ...