
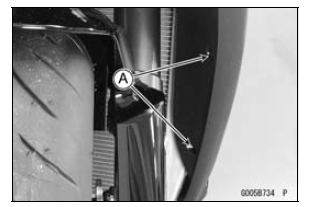
Pull up the core by the flat-head screwdriver (–), and then remove the quick rivet.
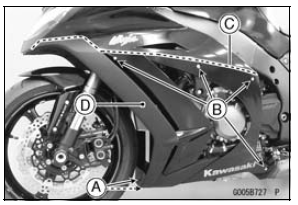
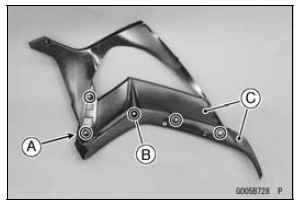
While pulling down the rear part of the fairing, clear the front side hooks.
 Fairings
 Lower Fairing Installation
Oil Cooler Installation
Replace the O-ring [A] with a new one.
Apply grease to the new O-ring.
Install the water hoses and hose clamps [A] as shown in
the figure.
Water Hose (About 300 mm, 11.8 in.) [B]
Water Hose (About 130 mm, 5.1 in.) [C]
Yellow Paint [D]
Tighten:
Torque - Water Hose Clamp S ...
Electrical Wiring
Wiring Inspection
Visually inspect the wiring for signs of burning, fraying,
etc.
If any wiring is poor, replace the damaged wiring.
Pull each connector [A] apart and inspect it for corrosion,
dirt, and damage.
If the connector is corroded or dirty, clean it carefully. If it
is da ...
KIBS Troubleshooting Outline
When an abnormality in the system occurs, the ABS indicator
light (LED) and KIBS indicator light (LED) light up and
the KIBS warning symbol are displayed on the LCD (Liquid
Crystal Display) to alert the rider. In addition, the nature of
the fault is stored in the memory of the KIBS hydraulic uni ...