
1. Timing Rotor
2. Crankshaft Sensor
3. Horn
4. Oil Pressure Switch
5. Rear Brake Light Switch
6. Oxygen Sensor (Equipped Models)
7. Alternator
8. Stator Coil
9. Gear Position Switch
10. Sidestand Switch
11. Immobilizer Amplifier (Equipped Models)
12. Radiator Fan Motor
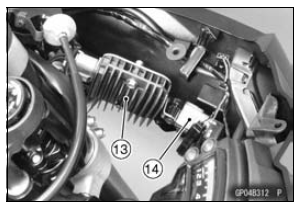
13. Regulator/Rectifier
14. Fuse Box 1
15. Relay Box
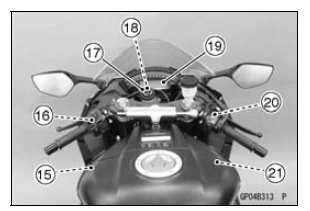
16. Starter Lockout Switch
17. Ignition Switch
18. Immobilizer Antenna (Equipped Models, Included in Ignition Switch)
19. Meter Unit
20. Front Brake Light Switch
21. ECU
22. Air Switching Valve
23. Stick Coils
24. Spark Plugs
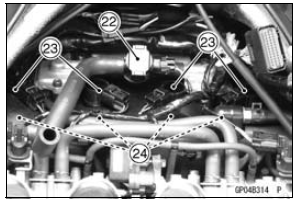
25. Water Temperature Sensor
26. Starter Motor
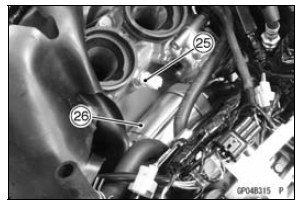
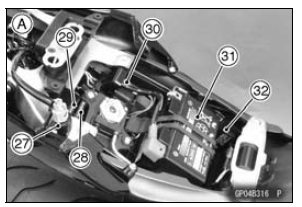
27. Vehicle-down Sensor
28. Fuse Box 2
29. Fuse Box 3 (KIBS Equipped Models)
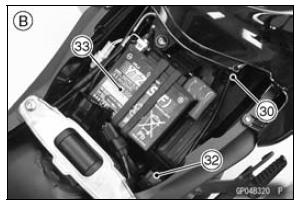
30. Starter Relay
31. Battery 12 V 8.6 Ah
32. Turn Signal Relay
A. ZX1000K Model
33. Battery 12 V 6 Ah
B. ZX1000J Model
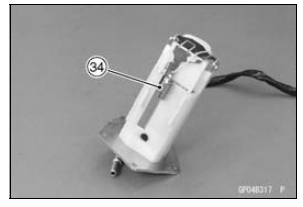
34. Fuel Reserve Switch (Included in Fuel Pump)
This page intentionally left blank.
 Special Tools and Sealant
 Wiring Diagram (US, CA and CAL without KIBS Models)
Clutch Lever Installation
Install the clutch lever so that the mating surface [A] of the
clutch lever clamp is aligned with the punch mark [B] of
the handlebar.
Tighten the upper clamp bolt first, and then the lower
clamp bolt.
Torque - Clutch Lever Clamp Bolts: 7.8 N·m (0.80 kgf·m, 69
in·lb)
There will be ...
Fuels Containing Oxygenates
Gasoline frequently contains oxygenates
(alcohols and ethers) especially
in areas of the U.S. and Canada
which are required to sell such reformulated
fuels as part of a strategy to
reduce exhaust emissions.
The types and volume of fuel oxygenates
approved for use in unleaded
gasoline by th ...
Cylinder Head Warp Inspection
Clean the cylinder head.
Lay a straightedge across the lower surface of the cylinder
head at several positions.
Use a thickness gauge [A] to measure the space between
the straightedge [B] and the head.
Cylinder Head Warp
Standard: – – –
Service Limit: 0.05 mm (0.0020 in.)
...