
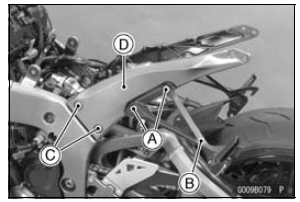
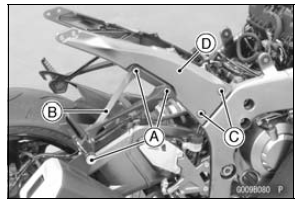
 Rear Frame Rear Removal
 Rear Frame Front Installation
Exhaust Pipe Removal
Remove:
Radiator (see Radiator and Radiator Fan Removal in the
Cooling System chapter)
Exhaust Pipe Clamp Bolt [A] (Loosen)
Remove the exhaust pipe holder nuts [A], and pull out the
exhaust pipe [B] forward from the premuffler chamber.
...
Leather, Vinyl, and Rubber
If your motorcycle has leather accessories,
special care must be taken.
Use a leather cleaner/treatment to
clean and care for leather accessories.
Washing leather parts with detergent
and water will damage them, shortening
their life.
Vinyl parts should be washed with the
rest of themo ...
Compression Damping Force Adjustment
To adjust the compression damping force, turn the compression
damping adjuster [A].
The standard adjuster setting is the 4 1/2 turns out from
the fully clockwise position.
WARNINGIf both adjusters are not adjusted
equally, handling
may be impaired and a hazardous condition ma ...