
90° [A]
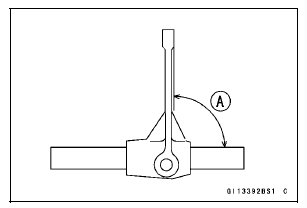
 Shift Drum Assembly
 Shift Fork/Gear Groove Wear Inspection
Dimmer Switch
High or low beam can be selected
with the dimmer switch. When the
headlight is on high beam ( ), the
high beam indicator light goes on.
High beam.......( )
Low beam.......( )
NOTE
When the headlight is on high beam,
both headlights go on. When the
headlight is on low beam, only one
headl ...
Brake Disc Installation
Install the brake disc on the wheel so that the marked side
[A] faces out.
Front Brake Discs [B]
Rear Brake Disc [C]
Apply a non-permanent locking agent to the threads of
the brake disc mounting bolts.
Tighten:
Torque - Brake Disc Mounting Bolts: 27 N·m (2.8 kgf·m, 20
...
Coolant Change
WARNINGCoolant can be extremely hot and cause
severe
burns, is toxic and very slippery. Do not remove
the radiator cap or attempt to change the coolant
when the engine is hot; allow it cool completely.
Immediately wipe any spilled coolant from tires,
frame, engine or othe ...