
Disconnect the subthrottle sensor connector and connect the setting adapter [A] between these connectors.
Special Tool - Throttle Sensor Setting Adapter: 57001 -1538
Subthrottle Sensor Output Voltage Connections to Adapter: Digital Meter (+) → R (sensor BL/W) lead Digital Meter (–) → BK (sensor BR/BK) lead
ECU Intake Air Temperature Sensor
Output Voltage
Standard: DC 0.8  1.0 V at
subthrottle valve full close
position (for reference)
DC 4.28  4.32 V at subthrottle valve
full
open position
NOTE
0.8 × 4.75 ÷ 5.00 = 0.76 V 1.0 × 4.75 ÷ 5.00 = 0.95 V Thus, the valid range is 0.76 ∼ 0.95 V
If the reading is out of the standard, check the subthrottle sensor resistance (see Subthrottle Sensor Resistance Inspection).
If the reading is within the standard, remove the ECU and check the wiring for continuity between harness connectors.
Special Tool - Hand Tester: 57001-1394
Disconnect the ECU and sensor connectors.
Wiring Continuity Inspection ECU Connector [A] ←→ Subthrottle Sensor Connector [B] BL/W lead (ECU terminal 12) [C] BR/BK lead (ECU terminal 13) [D]
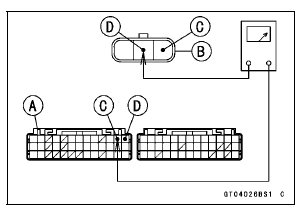
If the wiring is good, check the ECU for its ground and power supply (see ECU Power Supply Inspection in the Fuel System (DFI) chapter).
If the ground and power supply are good, replace the ECU (see ECU Removal/Installation in the Fuel System (DFI) chapter).
 Subthrottle Sensor Input Voltage Inspection
 Subthrottle Sensor Resistance Inspection
Fuel Hose Inspection (fuel leak, damage, installation condition)
If the motorcycle is not properly handled, the high pressure
inside the fuel line can cause fuel to leak [A] or the
hose to burst. Remove the fuel tank (see Fuel Tank Removal
in the Fuel System (DFI) chapter) and check the
fuel hoses.
Replace the fuel hose if any fraying, cracks [B] or ...
Rider’s Seat Removal
Remove the bolts and seat cover.
A. Bolts
B. Seat Cover
Remove the mounting bolts and pull
off the seat upward.
A. Mounting Bolts
B. Rider’s Seat ...
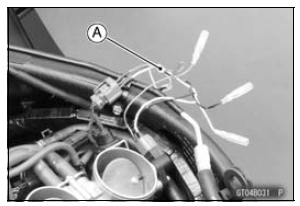
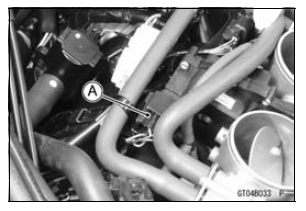
Cable, Wire, and Hose Routing
1. Clamp (Hold the regulator/rectifier lead. Run the lead inside of the
installation hole.)
2. Clamp (Bend down the clamp, and hold the main harness and the vacuum hose
(equipped
models).)
3. Clamp (Hold the air intake solenoid valve lead (equipped models).)
4. Run the vacuum hose under ...