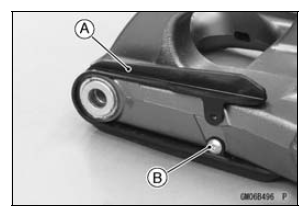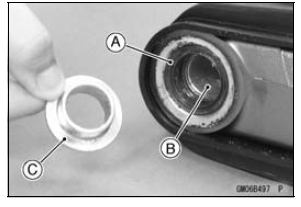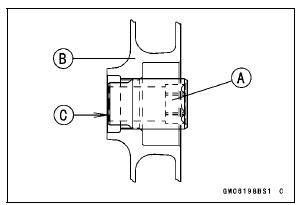

Replace the chain guide if it shows any signs of abnormal wear or damage.
Apply a non-permanent locking agent to the threads of the chain guide bolt [B].


NOTE
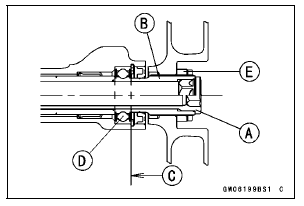
Tighten the swingarm pivot shaft until the clearance [C] between the ball bearing [D] and collar come to 0 mm (0 in.).

Torque - Swingarm Pivot Shaft: 20 N·m (2.0 kgf·m, 15 ft·lb)
Special Tool - Swingarm Pivot Nut Wrench: 57001-1597
Torque - Swingarm Pivot Adjusting Collar Locknut: 98 N·m (10.0 kgf·m, 72 ft·lb)
Torque - Swingarm Pivot Shaft Nut: 108 N·m (11.0 kgf·m, 80 ft·lb)
 Swingarm Removal
 Swingarm Bearing Removal
Crankshaft Removal
Split the crankcase (see Crankcase Splitting).
Remove:
Connecting Rod Big End Nuts [A]
Connecting Rod Big End Caps [B]
NOTE
Mark and record the locations of the connecting rods
and their big end caps so that they can be reassembled
in their original positions.
Remove the crank ...
Wheel Rotation Sensor Rotor Inspection
Remove:
Wheels (see Front/Rear Wheel Removal in the
Wheels/Tires chapter)
Brake Disc Mounting Bolts [A]
Sensor Rotor [B]
Front Wheel [C]
Rear Wheel [D]
Visually inspect the wheel rotation sensor rotor.
If the rotor is deformed or damaged (chipped teeth [A]),
replace the ...
Rear Wheel Rotation Sensor Wiring Inspection (Service Code b 45)
Disconnect the rear wheel rotation sensor lead connector
[A] (see Rear Wheel Rotation Sensor Removal in the
Brakes chapter).
Disconnect the KIBS hydraulic unit lead connector (see
KIBS Hydraulic Unit Removal in the Brakes chapter).
Check the wiring continuity of the G lead and R ...