
Special Tool - Inside Circlip Pliers: 57001-143
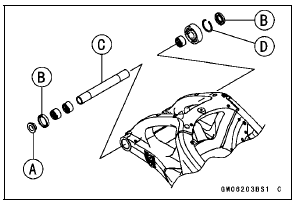
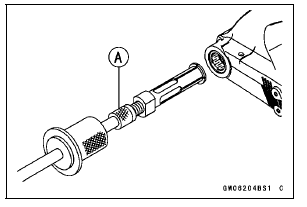
Special Tool - Oil Seal & Bearing Remover [A]: 57001-1058
 Swingarm Installation
 Swingarm Bearing Installation
Throttle Body Assy Holder Installation
Be sure to install the new O-rings [A].
Using a high flash-point solvent, clean off any oil or dirt
that may be on the silicone sealant coating area. Dry
them with a clean cloth.
Apply silicone sealant to any two positions of the new O
-ring.
Sealant - Liquid Gasket, TB1211F: 92104-0 ...
Current Mileage
This display mode shows the current
mileage by numerical value. The current
mileage display is renewed every
4 seconds.
A. Current Mileage
B. “km/L”
NOTE
The display unit modes can be
changed, refer to the “Unit Setting”
item in this section.
The numerical value shows “ ...
Front Wheel Installation
NOTE
The direction of the wheel rotation [A] is shown by an
arrow [B] on the wheel spoke.
Check the wheel rotation mark on the front wheel and
install it.
Apply high-temperature grease to the grease seal lips.
Fit the collars [A] on the both sides of the hub.
The collars are i ...