
 Air Intake Solenoid Valve
Installation (Other than US, CA
and CAL Models)
Air Intake Solenoid Valve
Installation (Other than US, CA
and CAL Models) Vacuum Chamber Installation
(Other than US, CA and CAL
Models)
Vacuum Chamber Installation
(Other than US, CA and CAL
Models)Engine Stop Switch
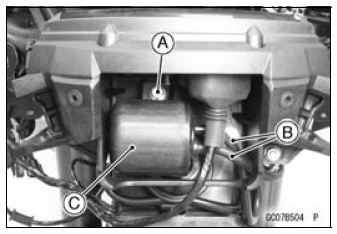
A. Engine Stop Switch
B. START/STOP Switch (for Stop Watch)
C. Starter Button
In addition to the ignition switch,
the engine stop switch must be in
the
position for the motorcycle to
operate.
The engine stop switch is for emergency
use. If required, move the switch
to the positio ...
Separator Operation Test
WARNINGGasoline is extremely flammable and can be
explosive
under certain conditions. Turn the ignition
switch OFF. Do not smoke. Make sure the area is
well-ventilated and free from any source of flame
or sparks; this includes any appliance with a pilot
light.
...
Radiator Fan Relay Inspection
Refer to the Relay Circuit Inspection in the Electrical System
chapter
If the radiator fan relay is normal, check the wiring for
continuity, using the wiring diagram in this section.
Special Tool - Hand Tester: 57001-1394
If the wiring is good, check the ECU for its ground and
power supp ...