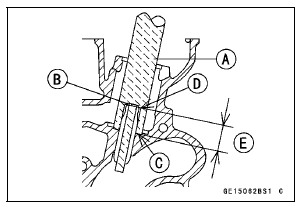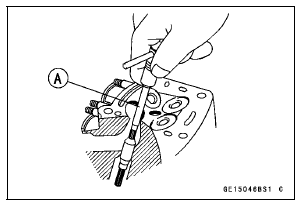


 302°F).
NOTICE
Do not heat the cylinder head with a torch. This will warp the cylinder head. Soak the cylinder head and heat the oil.
13.3  13.5 mm (0.52
 0.53 in.) [E]
Special Tools - Valve Guide Driver: 57001-1564 Washer: 57001-1612

Special Tool - Valve Guide Reamer,
 4.5: 57001-1333

 Valve Guide Removal
 Valve-to-Guide Clearance Measurement (Wobble Method)
Exploded View
13. Front Wheel Rotation Sensor
B: Apply brake fluid.
L: Apply a non-permanent locking agent.
R: Replacement Parts
S: Follow the specified tightening sequence.
Si: Apply silicone grease (ex. PBC grease).
10. Rear Wheel Rotation Sensor
B: Apply brake fluid.
G: Apply gr ...
Swingarm Removal
Remove:
Rear Wheel (see Rear Wheel Removal in the
Wheels/Tires chapter)
Mud Guard with Rear Brake Hose (see Mud Guard Removal
in the Frame chapter)
Rocker Arm (see Rocker Arm Removal)
Remove:
Brake Hose Clamp Bolt [A]
Unscrew the swingarm pivot shaft nut [A].
Usi ...
Intake Air Pressure Sensor #1 Output Voltage Inspection
Measure the output voltage at the intake air pressure sensor
#1 in the same way as input voltage inspection, note
the following.
Disconnect the intake air pressure sensor #1 connector
and connect the measuring adapter [A] between these
connectors.
[B] Main Harness
[C] Intake Air Pressu ...