
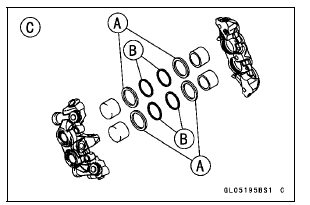
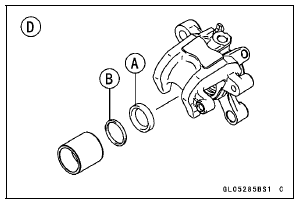
The fluid seal (piston seal) [A] is placed around the piston to maintain clearance between the pad and the disc. If the seal is in a poor condition, it could lead the pad to wear excessively or the brake to drag, which may cause the temperature of the discs or the brake fluid to increase.
Brake fluid leakage around the pad.
Brakes overheat.
Considerable difference in inner and outer pad wear.
Seal and piston are stuck together.
If the fluid seal is replaced, replace the dust seal [B] as well. Also, replace all seals every other time the pads are changed.
Front Caliper [C] Rear Caliper [D]
 Caliper Installation
 Rear Caliper Dust Boot and Friction Boot Damage
Balancer Installation
Position the crankshaft at #2, 3 positions TDC or at #1, 4
positions TDC.
Install the balancer assembly as follows.
Align the punch mark [A] on the weight and the projection
[B] on the crankcase.
Engage the balancer gear and the crankshaft gear.
Insert the balancer shaft until it is bot ...
Spring Preload Adjustment
To adjust the spring preload, turn the spring preload adjuster
[A].
The standard adjuster setting is the 6 turns in from the
fully counterclockwise position.
WARNINGIf both adjusters are not adjusted
equally, handling
may be impaired and a hazardous condition may
result. B ...
Seat Cover Installation
Installation is the reverse of removal. Note the following.
When installing the pad [A], install it along the corner [B]
as shown in the figure.
When installing the pad [C], align the ends [D], along the
corner [E], and wrap [F] the upper edge of the seat cover.
Install the damper [A] ...