
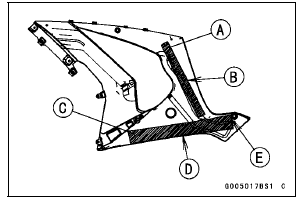
When installing the pad [A], align the edge of the pad and the marking of the fairing [B].
When installing the pad [C], align the edge of the pad and the fairing [D], and fit the edge of the pad to the boss [E].
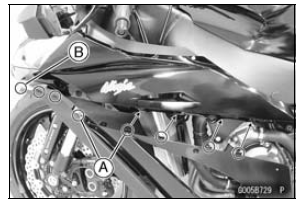
Insert the hook portions [A] into the slots.
Insert the front hook [B] first, then insert the remainder sequentially.
 Lower Fairing Removal
 Upper Fairing Assembly Removal
Camshaft Chain Tensioner Installation
Replace the O-ring [A] with a new one.
Apply grease to the new O-ring.
Release the stopper [B] and push the push rod [C] into the
interior of the tensioner body [D] so that the position of the
push rod is 3 or 4 notches [E] as shown in the figure.
Install the tensioner body so that the ...
Throttle Control System Inspection
Check the throttle grip free play [A].
If the free play is incorrect, adjust the throttle cables.
Throttle Grip Free Play
Standard: 2 3 mm (0.08
0.12 in.)
Check that the throttle grip [B] moves smoothly from full
open to close, and the throttle closes quickly and completely
by the ...
Troubleshooting Guide
NOTE
Refer to the Fuel System chapter for most
of DFI trouble shooting guide.
This is not an exhaustive list, giving every
possible cause for each problem listed. It
is meant simply as a rough guide to assist
the troubleshooting for some of the more
common difficulties.
Engine Doe ...