
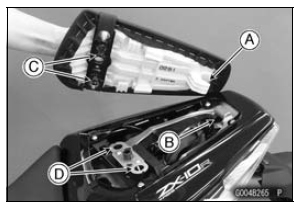
 Rear Seat Removal
 Fairings
KIBS Hydraulic Unit Terminal Names
1. Ground: BK
2. CAN Communication Line (High): GY/BL
3. Front Wheel Rotation Sensor Signal Input: Y
4. Power Supply: BR/W
5. KIBS Kawasaki Self-Daignosis System Terminal: P
6. Front and Rear Brake Light Switch Signal: BL/R
7. Unused
8. Front Wheel Rotation Sensor Signal Output: G/Y
9. P ...
Starter Motor Assembly
Install the positive brush assy [A] and the starter motor
terminal [B] as shown in the figure.
Replace the O-ring [C] with a new one, and install it.
Install:
Brush Springs [A]
Negative Brush Assy [B]
Turn the stopper side [C] to inside.
Tighten:
Torque - Brush Holder S ...
How Do I Get Warranty Service?
If there is a problem with your vehicle within the limited warranty period,
you will
need to schedule a service appointment and provide any maintenance records to
an authorized Kawasaki dealer for inspection and diagnosis. You can go to any
Kawasaki dealer for warranty repairs. Your Kawasaki de ...