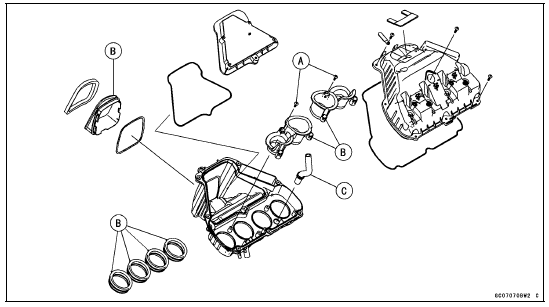


 Air Cleaner Housing Installation
 Air Cleaner Housing Assembly
Clock
To adjust hours and minutes, do the
followings while the motorcycle is at a
stop.
Turn the ignition switch to тАЬONтАЭ.
Display the odometer in the multifunction
display. Refer to the тАЬMultifunction
DisplayтАЭ item in this section.
Push the lower button for more than
2 seconds. Bot ...
Air Suction Valve Inspection
Remove the air suction valve (see Air Suction Valve Removal).
Visually inspect the reeds [A] for cracks, folds, warps,
heat damage or other damage.
If there is any doubt as to the condition of the reeds, replace
the air suction valve as an assembly.
Check the reed contact areas [B] of ...
Clutch Installation
Apply engine oil to the needle bearing [A] and the sleeve
[B].
Install:
Needle Bearing
Sleeve
Install the clutch housing [A].
Fit the holes [B] and projections [C].
Engage the clutch housing gear and the crankshaft primary
gear.
Install the spacer [A] and the clutch ...