
Air Switching Valve Operation Test
Refer to the Air Suction System Damage Inspection in the Periodic Maintenance chapter.
Air Switching Valve Unit Test
Special Tool - Hand Tester: 57001-1394
Air Switching Valve Resistance
Standard: 20  24 Ω at 20°C (68°F)
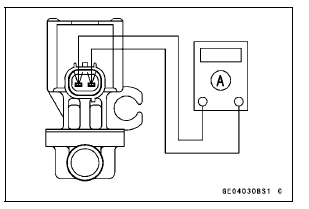
If the resistance reading is out of the specified value, replace it with a new one.
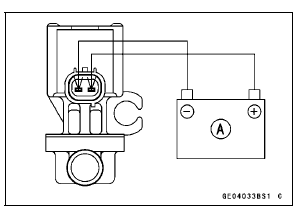
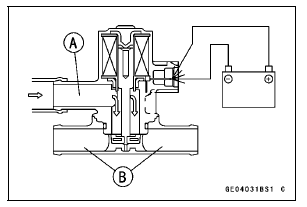
If the air switching valve dose not operate as described, replace it with a new one.
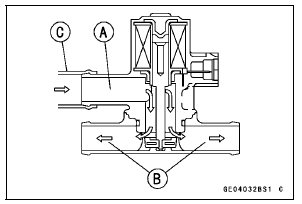
NOTE
To check air flow through the air switching valve, just blow through the air switching valve hose (intake side) [C].
Air Switching Valve Circuit
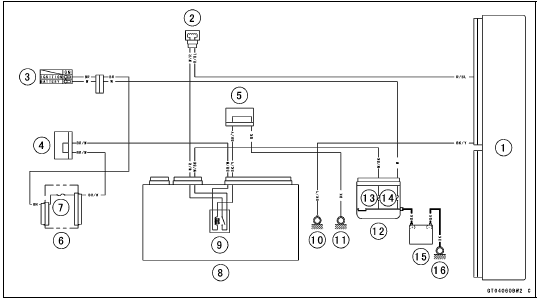
1. ECU
2. Air Switching Valve
3. Ignition Switch
4. Joint Connector F
5. Joint Connector A
6. Fuse Box 1
7. Ignition Fuse 15 A
8. Relay Box
9. ECU Main Relay
10. Frame Ground 1
11. Frame Ground 3
12. Starter Relay
13. ECU Fuse 15 A
14. Main Fuse 30 A
15. Battery
16. Engine Ground
 Turn Signal Relay Inspection
Idle Speed Control Valve Actuator Input Voltage Inspection
NOTE
Be sure the battery is fully charged.
Turn the ignition switch to OFF.
Disconnect the idle speed control valve actuator connector
and connect a suitable measuring leads [A] between
these connectors as shown in the figure.
Main Harness [B]
Idle Speed Control Valve Actua ...
Kawasaki Clean Air System
The Kawasaki Clean Air System
(KCA) is a secondary air suction system
that helps the exhaust gases to
burn more completely. When the spent
fuel charge is released into the exhaust
system, it is still hot enough to
burn. The KCA System allows extra
air into the exhaust system so that the
spen ...
Rear Shock Absorber Installation
Replace the rear shock absorber nuts and tie-rod nuts
with new ones.
Tighten:
Torque - Rear Shock Absorber Nuts: 34 N·m (3.5 kgf·m, 25
ft·lb)
Tie-Rod Nuts: 34 N·m (3.5 kgf·m, 25 ft·lb)
When installing the rear shock absorber bracket [A], install
it so that the recess side [B] ...
