
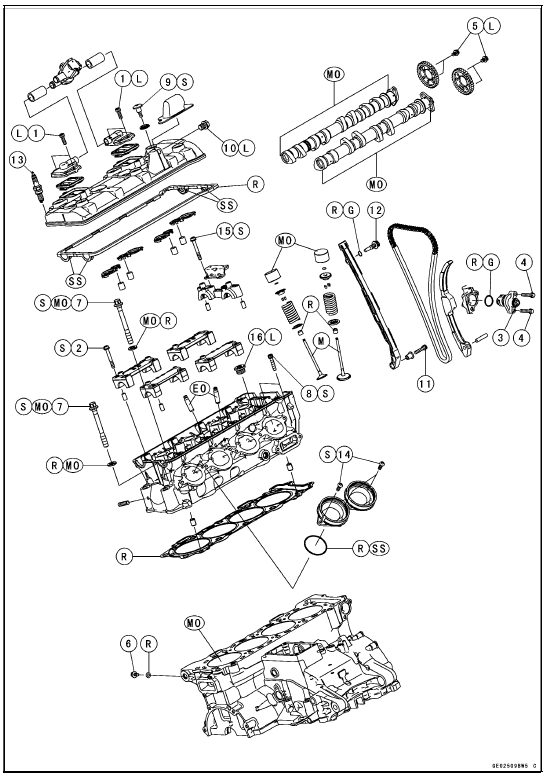
EO: Apply engine oil.
G: Apply grease.
L: Apply a non-permanent locking agent.
M: Apply molybdenum disulfide grease.
MO: Apply molybdenum disulfide oil solution.
(mixture of the engine oil and molybdenum disulfide grease in a weight ratio 10:1)
R: Replacement Parts
S: Follow the specified tightening sequence.
SS: Apply silicone sealant.
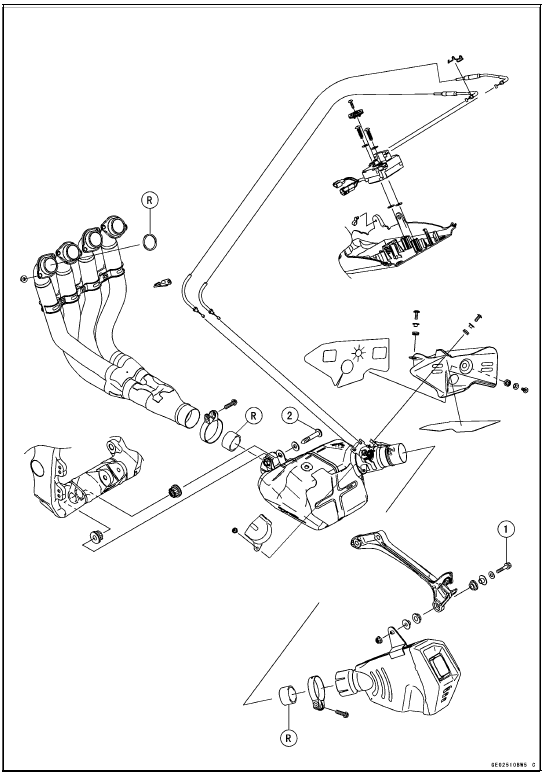

R: Replacement Parts
 Engine Top End
 Exhaust System Identification
Front Wheel Rotation Sensor Signal (Service Code 27)
Front Wheel Rotation Sensor Signal Inspection
The front wheel rotation sensor sends the signal to the
ECU through the KIBS hydraulic unit (KIBS equipped
models). For other than KIBS equipped models, the
signal is sent directly to the ECU.
The ECU uses the wheel rotation sensor signal for KTRC
...
Check 2-1: Speedometer Inspection
Using the suitable stand, raise the rear wheel off the
ground.
Rotate the rear wheel by hand or start the engine.
Check that the display changes speedometer.
If the display function does not work, check the following
parts.
Rear Wheel Rotation Sensor (see Wheel Rotation Sensor
Inspe ...
High Speed Compression Damping Adjustment
Turn the high speed compression
damping force adjuster clockwise to
increase damping force or counterclockwise
to decrease it.
NOTICE
Do not turn the compression
damping force adjuster beyond
the fully seated position or the
adjusting mechanism may be
damaged.
A. Compression Da ...