
 Oxygen Sensor Installation (Equipped Models)
 Gear Position Switch Installation
Nozzle Assy Disassembly
Remove the nozzle assy (see Nozzle Assy Removal).
Pull out the secondary fuel injectors [A] from the delivery
pipe assy [B].
NOTE
Do not damage the insertion portions of the injectors
when they are pulled out from the delivery pipe assy.
NOTICE
Never drop the secondary fuel injecto ...
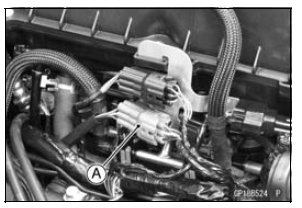
Subthrottle Valve Actuator Resistance Inspection
Turn the ignition switch to OFF.
Disconnect the subthrottle valve actuator connector [A].
Connect a digital meter to the subthrottle valve actuator
connector [A].
Measure the subthrottle valve actuator resistance.
Subthrottle Valve Actuator Resistance
Connections: Y/BK lead [1 ...
Brake Hose and Pipe Damage and Installation Condition Inspection
Inspect the brake hoses, pipes and fittings for deterioration,
cracks and signs of leakage.
The high pressure inside the brake line can cause fluid to
leak [A] or the hose to burst if the line is not properly maintained.
Bend and twist the rubber hose while examining
it.
Replace the ...