
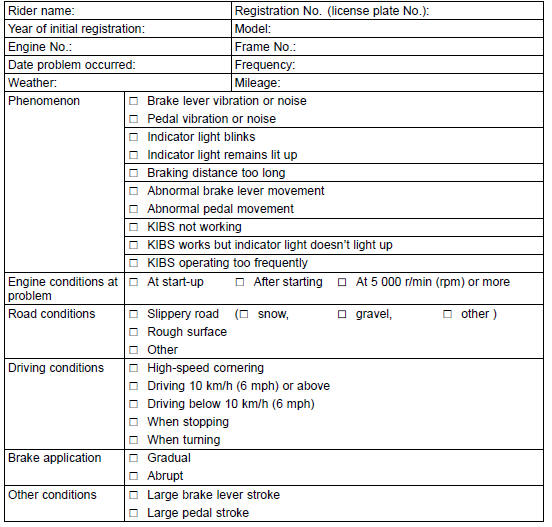
Sample Diagnosis Sheet
Pre-Diagnosis Inspection 1
Pre-Diagnosis Inspection 2
Self-diagnosis Outline
Refer to the Self-Diagnosis System chapter for the self-diagnosis or service code.
 KIBS Troubleshooting Outline
 ABS and KIBS Indicator Lights (LED) Inspection
Steering Play Inspection
Remove the lower fairings (see Lower Fairing Removal in
the Frame chapter).
Raise the front wheel off the ground with the jack.
Special Tools - Jack: 57001-1238
Jack Attachment: 57001-1608
With the front wheel pointing straight ahead, alternately
tap each end of the handlebar. The f ...
Check 2-2: Fuel Level Warning Inspection
Remove:
Fuel Tank (see Fuel Tank Removal in the Fuel System
(DFI) chapter)
Connect the resistor(s) [A] (about 50 to 100 Ω) between
the fuel pump connector terminal [B] of the main harness
side and the battery negative (–) terminal [C] as shown.
Turn the ignition switch ...
ESD Actuator Input Voltage Inspection
NOTE
Be sure the battery is fully charged.
Turn the ignition switch to OFF.
Disconnect the ESD actuator connector and connect a
suitable measuring leads [A] between these connectors
as shown.
Main Harness [B]
ESD Actuator [C]
Connect the peak voltage adapter [D] and a digital ...