
If the fuse is good, check the wiring continuity as follows.
Disconnect: Battery Positive Cable (see Battery Removal in the Electrical System chapter) KIBS Hydraulic Unit Lead Connector (see KIBS Hydraulic Unit Removal in the Brakes chapter)
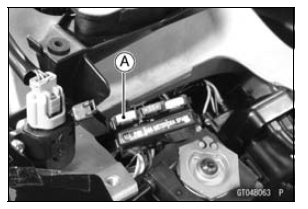
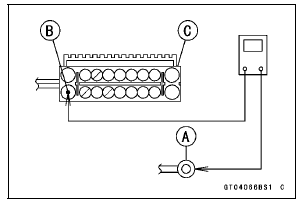
Check the wiring continuity between the positive cable terminal [A] of the battery and R/W lead terminal [B] in the KIBS Hydraulic Unit Lead Connector [C].
If the wiring is open, replace or repair the harness (see KIBS System Circuit in the Brakes chapter).
If the wiring is good, go to next step.
The KIBS motor relay is built in the KIBS Hydraulic Unit.
Therefore the relay cannot be checked directly.
If this service code appears even if all checks are ended, replace the KIBS hydraulic unit.
If the service code does not appear, the KIBS system normal (temporary failure).
 Front, Rear Wheel Rotation Difference Abnormal Inspection (Service Code b
25)
Front, Rear Wheel Rotation Difference Abnormal Inspection (Service Code b
25) Front Wheel Rotation Sensor Signal Abnormal (Service Code b 42)
ESD (Electronic Steering Damper) ECU Communication Error (Service Code 3C,
ZX1000JD/KD)
ESD ECU Communication Line Inspection
When the data (for status of ESD system) is not sent from
the ESD ECU to the meter unit and ECU, the service code
3C is displayed.
The data is sent through the CAN communication line.
The service code 3C is detected with the meter unit.
The FI symbol does ...
Race Mode Display
This mode gives priority to reading
the gear position rather than the
speedometer reading.
The gear position indicator can
be displayed at the position of the
speedometer on the normal mode.
Also the speedometer is displayed instead
of the clock on the normal mode.
This mode can be used ...
Engine Removal
Support the rear part of the swingarm with a stand.
Squeeze the brake lever slowly and hold it with a band
[A].
WARNINGMotorcycle may fall over unexpectedly
resulting in
an accident or injury. Be sure to hold the front brake
when removing the engine.
NOTICE
Be sure ...