
NOTICE
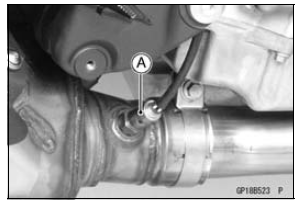
Do not pull strongly, twist, or bend the oxygen sensor lead. This may cause the wiring open.
 Fuel Reserve Switch Inspection
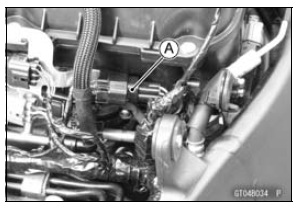
 Oxygen Sensor Installation (Equipped Models)
Caliper Rubber Parts Replacement
Front Caliper Disassembly
Remove:
Front Caliper (see Front Caliper Removal in the Brakes
chapter)
Brake Pads (see Front Brake Pad Removal in the Brakes
chapter)
Remove:
Front Caliper Assembly Bolts [A]
Split the front caliper.
Remove:
Pad Spring
O-ring [A]
U ...
Hub Bearing Removal
Remove the wheels (see Front/Rear Wheel Removal),
and take out the following.
Collars
Coupling (Out of rear hub)
Grease Seals
Use the bearing remover to remove the hub bearings [A].
NOTICE
Do not lay the wheel on the ground with the disc
facing down. This can damage or warp the d ...
Shift Drum Assembly
Press and insert the ball bearing [A] on the shift drum [B]
until it is bottomed.
Install:
Ball Bearing [C]
Dowel Pin [D] and Shift Drum Cam [E]
Align the pin with the groove in the shift drum cam.
Apply a non-permanent locking agent to the shift drum
cam holder bolt [F].
Tight ...