
If the rocker arm [A] does not smoothly stroke or noise is found, inspect the fasteners and bearings (see Tie-Rod/Rocker Arm Bearing, Sleeve Inspection in the Suspension chapter).
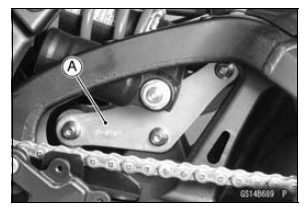
In this photo, the foot guard has been removed for clarity.
 Front Forks/Rear Shock Absorber Operation Inspection
 Tie-Rod Operation Inspection
Fuel Pump Relay Inspection
Refer to the Relay Circuit Inspection in the Electrical System
chapter.
If the fuel pump relay is normal, check the wiring to the
fuel pump relay (see Fuel Pump Relay Circuit).
Special Tool - Hand Tester: 57001-1394
If the wiring is good, check the ECU for its ground and
power supply (se ...
Special Tools and Sealant
Oil Pressure Gauge, 5 kgf/cm²:
57001-125
Hand Tester:
57001-1394
Needle Adapter Set:
57001-1457
Extension Tube:
57001-1578
Fuel Pressure Gauge Adapter:
57001-1593
Fuel Hose:
57001-1607
Measuring Adapter:
57001-1700
Liquid Gasket, TB1211:
56019-120
...
Camshaft Removal
Remove:
Cylinder Head Cover (see Cylinder Head Cover Removal)
Crankshaft Sensor Cover (see Crankshaft Sensor Removal
in the Electrical System chapter)
Using a wrench on the timing rotor bolt [A], turn the crankshaft
clockwise until the line [B] (TDC mark for #1,4 pistons)
on the timin ...