
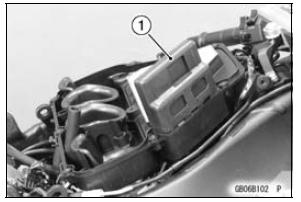
1. FI ECU
The FI ECU analyzes the motorcycle conditions based on the signals from the front/rear wheel rotation sensors and FI sensors (such as the crankshaft sensor and main throttle sensor), and controls engine power by reducing the number of ignition and retarding the ignition timing. The mode-switching signal is transmitted to the FI ECU by the CAN system via the meter ECU. If a failure occurs in the system, the FI ECU deactivates S-KTRC and displays the warning indication in the meter.
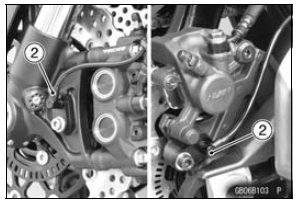
2. Wheel Rotation Sensor
The wheel rotation sensor converts front and rear wheel rotation speed to a pulse signal and transmits it to the FI ECU.
As for the KIBS (Kawasaki Intelligent anti-lock Brake System) equipped model, a pulse signal is transmitted via the KIBS ECU.
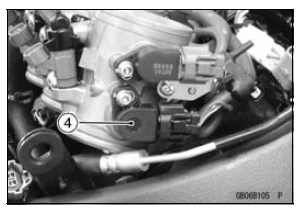
3. Crankshaft Sensor
The crankshaft sensor converts the engine speed to a pulse signal and transmits it to the FI ECU.
4. Main Throttle Sensor
The main throttle sensor converts the throttle position to a voltage signal and transmits it to the FI ECU.
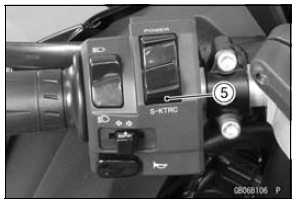
5. S-KTRC Button
The mode-switching signal is transmitted to the meter
ECU by depressing the S-KTRC button (0.3
 0.4 sec.).
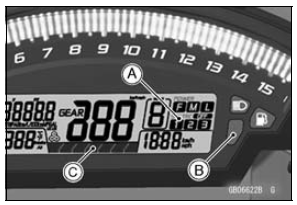
6. Multifunction Meter
The multifunction meter receives a mode-switching signal and displays the mode [A], and transmits it to the FI ECU by the CAN system.
When a failure occurs in the system, themultifunction meter displays the warning indication by blinking the warning indicator light (yellow LED) [B] and mode indicator symbol.
It also displays the S-KTRC operating conditions in the level indicator [C].
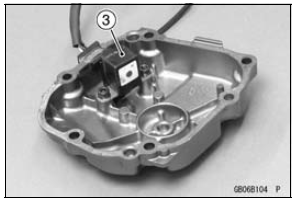
7. KIBS ECU
As for the KIBS equipped model, the front and rear wheel sensor signals are transmitted to the FI ECU via the KIBS ECU.

 Overview
 Mode-switching
Keys
This motorcycle has a combination
key, which is used for the ignition
switch, steering lock, seat lock, and
fuel tank cap.
Included with the key is a key number,
which may be stamped on a separate
plate. Record the key number in
the space provided and store the number
in a safe place. If y ...
Brake Pedal Removal
Remove:
Rear Master Cylinder Mounting Bolts [A]
Foot Guard [B]
Screw and Stopper [C]
Bolt [D]
Front Footpeg Bracket Bolts [E]
Cable Guide [F]
Remove:
Cotter Pin [A]
Joint Pin [B]
Rear Brake Light Switch Spring [C]
Return Spring [D]
Remove the brake pedal mounting b ...
Diode Circuit Inspection
Remove the relay box (see Relay Box Removal).
Check conductivity of the following pairs of terminals (see
Relay Box Internal Circuit in this section).
Diode Circuit Inspection
The resistance should be low in one direction and more
than 10 times as much in the other direction. If any dio ...