
NOTE
Be sure the battery is fully charged.
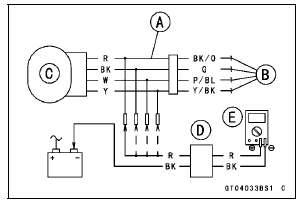
Main Harness [B] Subthrottle Valve Actuator [C]
Special Tool - Measuring Adapter: 57001-1700
Connect the peak voltage adapter [D] and a digital meter [E] to the measuring adapter leads.
Special Tool - Peak Voltage Adapter: 57001-1415 Type: KEK-54-9-B
Special Tool - Peak Voltage Adapter: 57001-1415 Type: KEK-54-9-B
Subthrottle Valve Actuator Input Voltage Connections to Adapter:
(I) Digital Meter (+) → R (actuator BK/O) lead Digital Meter (–) → Battery (–) terminal (II) Digital Meter (+) → BK (actuator G) lead Digital Meter (–) → Battery (–) terminal (III) Digital Meter (+) → W (actuator P/BL) lead Digital Meter (–) → Battery (–) terminal (IV) Digital Meter (+) → Y (actuator Y/BK) lead Digital Meter (–) → Battery (–) terminal
Input Voltage
Standard: About DC 8.5  10.5 V and
then 0 V or
About DC 8.5  10.5 V
If the reading is in specification, but the actuator does not operate, replace the throttle body assy.
If the reading is out of the specification, remove the ECU and check the wiring for continuity between main harness connector.
Special Tool - Hand Tester: 57001-1394
Disconnect the ECU and actuator connectors.
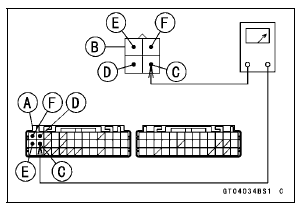
Wiring Continuity Inspection ECU Connector [A] ←→ Subthrottle Valve Actuator Connector [B] G lead (ECU terminal 15) [C] BK/O lead (ECU terminal 2) [D] P/BL lead (ECU terminal 14) [E] Y/BK lead (ECU terminal 1) [F]
If the wiring is good, check the ECU for its ground and power supply (see ECU Power Supply Inspection in the Fuel System (DFI) chapter).
If the ground and power supply are good, replace the ECU (see ECU Removal/Installation in the Fuel System (DFI) chapter).
Subthrottle Valve Actuator Circuit
1. ECU
2. Subthrottle Valve Actuator
 Subthrottle Valve Actuator Resistance Inspection
Exhaust Butterfly Valve Actuator Sensor Input Voltage Inspection
NOTE
Be sure the battery is fully charged.
Turn the ignition switch to OFF.
Remove the front seat (see Front Seat Removal in the
Frame chapter).
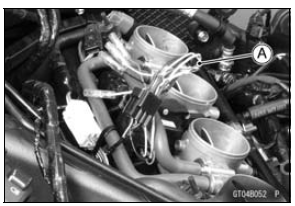
Remove the screws [A] and the exhaust butterfly valve
actuator temporarily with the cables installed.
Disconnect the exhaust butterf ...
Water Temperature Sensor Output Voltage Inspection
NOTE
Be sure the battery is fully charged.
Turn the ignition switch to OFF.
Remove the throttle body assy (see Throttle Body Assy
Removal in the Fuel System (DFI) chapter).
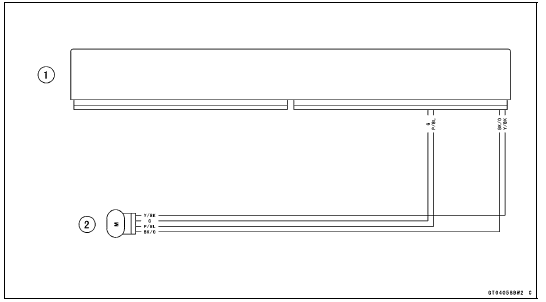
Disconnect the water temperature sensor connector and
connect the measuring adapter [A] between these connectors
...
Tie-Rod Removal
Squeeze the brake lever slowly and hold it with a band
[A].
Remove the front footpeg bracket bolts [A].
Raise the rear wheel off the ground with the jack (see
Rear Shock Absorber Removal).
Special Tools - Jack: 57001-1238
Jack Attachment: 57001-1608
Remove:
Upper ...
