
For ZX1000J Model
Fuel Level Warning Indicator Light (LED) [A] goes on “FUEL” blinks [B]
For ZX1000K Model
Warning Indicator Light (Yellow LED) [C] goes on FUEL Warning Symbol goes on “FUEL” blinks [B]
If the display and indicator light (LED) function does not work, replace the meter unit.

 Check 2-1: Speedometer Inspection
 Check 2-3: Intake Air Temperature Inspection
Crankshaft Main Bearing
Insert/Journal Wear Inspection
Split the crankcase (see Crankcase Splitting).
Cut strips of plastigage to journal width.
Place a strip on each journal parallel to the crankshaft
installed in the correct position.
Tighten the crankcase bolts to the specified torque (see
Crankcase Assembly).
NOTE
Do not turn ...
Service Code Erasing
When repair has been done, warning indicator light (LED) and warning symbol
go off and service
code are not displayed.
But the service codes stored in memory of the ECU are not erased to preserve
the problem history.
In this model, the problem history can not be erased. However, the memorie ...
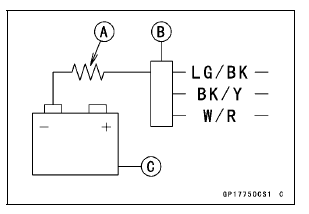
Gear Position Switch Output Voltage Inspection
NOTE
Be sure the battery is fully charged.
Turn the ignition switch to OFF.
Remove the fuel tank (see Fuel Tank Removal in the Fuel
System (DFI) chapter).
Disconnect the sidestand switch/gear position switch lead
connector [A].
Connect the measuring adapter [A] between the ...