
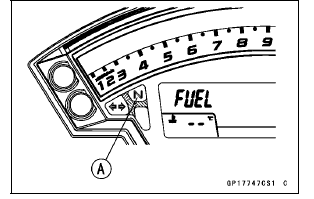
If the indicator light does not go on, replace the meter unit.
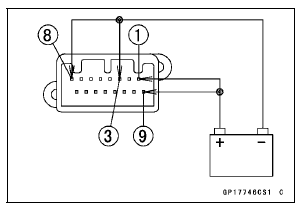
 Check 3-5: Warning Indicator Light (Red LED) (Oil Pressure Warning)
Inspection
Check 3-5: Warning Indicator Light (Red LED) (Oil Pressure Warning)
Inspection Check 3-7 Stop Watch Inspection
Damping Force Adjustment (
ZX1000JC/KC)
To adjust the damping force, turn the damping adjuster
[A] until you feel a click.
The standard adjuster setting is the 18th click from the
1st of the fully clockwise position. If the damping feels too
soft or too stiff, adjust it in accordance with the following
table.
Damping Force Adj ...
Lower Crankcase Assembly
Install the ball bearing [A] and the oil level inspection window
[B] until they are bottomed
Apply soap and water solution to the oil level inspection
window before installation.
Install the new circlip [C].
Apply a non-permanent locking agent to the oil passage
plug [D].
Tighten: ...
Pressure Testing
Remove:
Upper Fairing Assembly (see Upper Fairing Assembly
Removal in the Frame chapter)
Radiator Cap [A]
Remove the radiator cap in two steps. First turn the cap
counterclockwise to the first stop. Then push and turn it
further in the same direction and remove the cap.
Install the ...