
NOTE
Do not use emery or sand paper on the commutator.
Replace the starter motor with a new one if there is any damage or wear.
Replace the starter motor with a new one if discoloration is noticed.
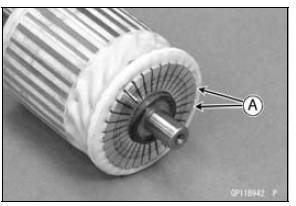
 Brush Inspection
 Armature Inspection
Tire Removal
Remove:
Wheels (see Front/Rear Wheel Removal)
Valve Core (Let out the air)
To maintain wheel balance, mark the valve stem position
on the tire with chalk so that the tire can be reinstalled in
the same position.
Chalk Mark or Yellow Mark [A]
Valve Stem [B]
Align [C]
Lu ...
CAN Communication (Transmission)/CAN Bus OFF Monitor Inspection (Service Code
b 57) CAN Communication (Reception) Monitor Inspection (Service Code b 58)
Remove:
Seat (see Seat Removal in the Frame chapter)
Immobilizer (Equipped Models)/Kawasaki Diagnostic
System Connector Cap [A]
Measure the CAN communication line resistance.
Immobilizer (Equipped Models)/Kawasaki Diagnostic
System Connector [A]
GY/BL Terminal [B]
LB Ter ...
Loading and accessories information
WARNINGIncorrect loading, improper installation
or use of accessories,
or modification of your motorcyclemay
result in an unsafe riding
condition. Before you ride the
motorcycle, make sure it is not
overloaded and that you have
followed these instructions.
With the ...