
Insert a thickness gauge [A] between the big end and either crank web to determine clearance.
Connecting Rod Big End Side Clearance
Standard: 0.13  0.38 mm
(0.0051  0.0150 in.)
Service Limit: 0.58 mm (0.023 in.)
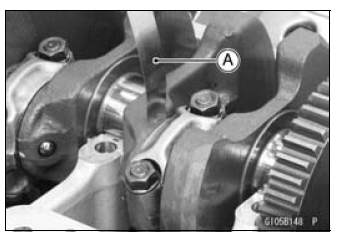
If the clearance exceeds the service limit, replace the connecting rod with new one and then check clearance again.
If the clearance is too large after connecting rod replacement, the crankshaft also must be replaced.
 Connecting Rod Twist Inspection
 Connecting Rod Big End
Bearing Insert/Crankpin Wear Inspection
Connecting Rod Big End
Bearing Insert/Crankpin Wear InspectionKeys
This motorcycle has a combination
key, which is used for the ignition
switch, steering lock, seat lock, and
fuel tank cap.
Included with the key is a key number,
which may be stamped on a separate
plate. Record the key number in
the space provided and store the number
in a safe place. If y ...
KIBS Hydraulic Unit Inspection
Remove the KIBS hydraulic unit (see KIBS Hydraulic Unit
Removal).
Visually inspect the connector terminals [A].
Replace the KIBS hydraulic unit or main harness if either
of the terminals are cracked, bent, or otherwise damaged.
If the KIBS hydraulic unit connector is clogged with mud
or ...
Stick Coil Primary Peak Voltage Inspection
NOTE
Be sure the battery is fully charged.
Remove the stick coils (see Stick Coil Removal).
Do not remove the spark plugs.
Connect the ECU to the harness.
Measure the primary peak voltage as follows.
Install the new spark plug [A] into each stick coil [B], and
ground them onto ...