
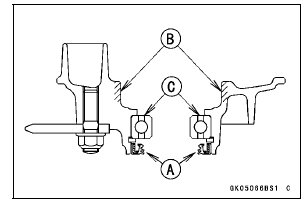
Apply high-temperature grease to the following.
Coupling Grease Seal Lips [A] Coupling Internal Surface [B] Ball Bearing [C]
 Rear Sprocket Installation
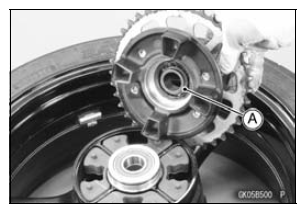
 Coupling Bearing Removal
Steering Play Adjustment
Remove:
Steering Stem Head with Handlebars (see Handlebar
Removal in the Steering chapter).
Bend the claws [A] of the claw washer [B] straighten.
Remove:
Steering Stem Locknut [C]
Claw Washer
Adjust the steering using the steering stem nut wrench
[A].
Special Tool - Ste ...
Troubleshooting guide
Engine Does Not Start
Starter Motor Won’t Turn
Engine stop switch off
Transmission not in neutral
Fuse blown
Battery leads do not make good electrical
contact with battery terminals
Battery discharged
Engine Cranks, But Won’t Start
No fuel in tank
Fuel line clogged
Fuel ...
Self-Diagnosis Outline
The self-diagnosis system is monitoring the following
mechanisms.
DFI System and Ignition System
S-KTRC System
Immobilizer System (Equipped Models)
KIBS and ABS (Equipped Models)
ESD (Electronic Steering Damper) System
(ZX1000JD/KD)
The following warning indicator lights (LED) are used for ...