
NOTE
Since the drive chain is installed through the swingarm, The chain can not be removed other than by cutting it.
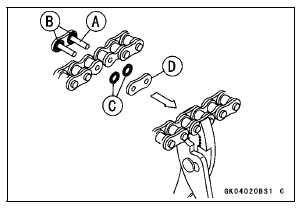
Prepare the new link pin, link plate, grease seals, and tools for rejoining the chain.
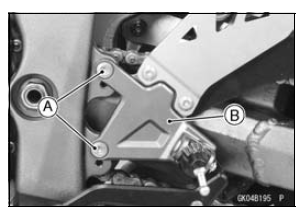
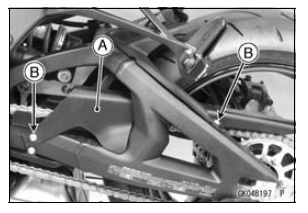
Remove: Bolts [A] Front Footpeg Bracket [B]
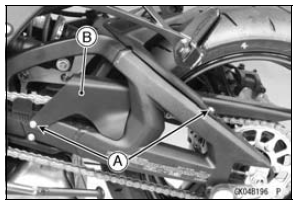
Remove: Bolts [A] Chain Cover [B]
NOTICE
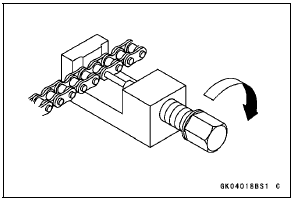
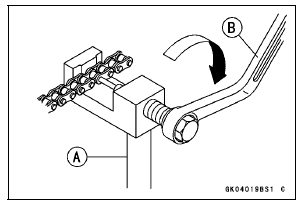
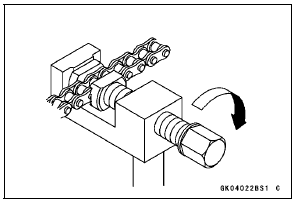
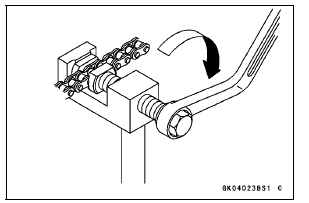
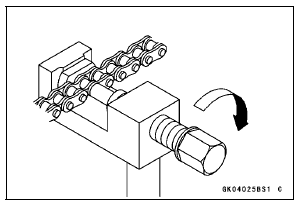
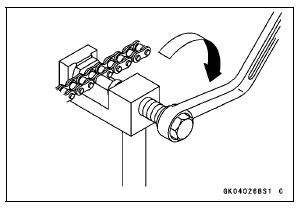
For safety, if the drive chain shall be replaced, replace it using a recommended tool.
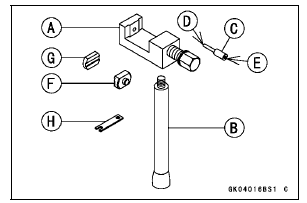
Recommended Tool - Type: EK Joint Tool #50 Brand: ENUMA
Body [A] Handlebar [B] Cutting and Riveting Pin [C] For Cutting [D] For Riveting [E] Plate Holder (A) [F] Plate Holder (B) [G] Gauge [H]
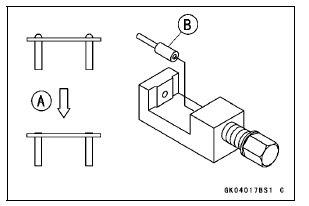

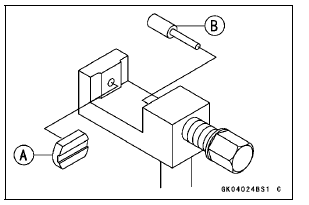
Link Pin Outside Diameter
Standard: 5.6  6.0 mm (0.22
 0.24 in.)
Link Plates Outside Width
Standard: (ZX1000JD/KD) 19.15  19.30
19.30
mm (0.754 
0.760 in.)
( ZX1000JC/KC) 19.35
 19.55 mm (0.762

0.770 in.)
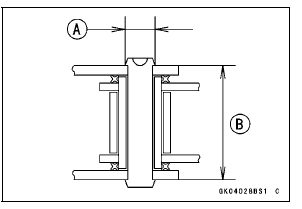
If the reading exceeds the specified length, cut and rejoin the chain again.
Apply a non-permanent locking agent to the bolts [B] and tighten them.
Torque - Front Footpeg Bracket Bolts: 25 N·m (2.5 kgf·m, 18 ft·lb)
 Drive Chain Slack Inspection
Exhaust Butterfly Valve Actuator Removal
NOTICE
Never drop the exhaust butterfly valve actuator especially
on a hard surface. Such a shock to the actuator
can damage it.
Remove:
Front Seat (see Front Seat Removal in the Frame chapter)
Clamp [A]
Screws [B] and Washers
Slide the covers [A] and loosen the lock nuts [B] ...
Front Brake Pad Installation
Check that the pad spring [A] is in place on the caliper.
Push the caliper pistons in by hand as far as they will go.
Install the brake pads [A] on the pad spring correctly.
Fit the pad into the groove of the caliper as shown in the
figure.
Install the pad pins while pushing t ...
Balance Weight Installation
Check if the weight portion has any play on the blade [A]
and clip [B].
If it does, discard it.
WARNINGUnbalanced wheels can create an unsafe
riding
condition. If the balance weight has any play on
the rib of the rim, the blade and/or clip have been
stretched. Replace th ...
