
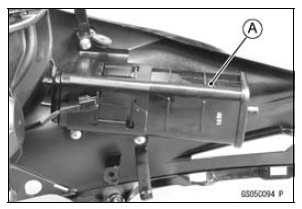
Remove the upper fairing assembly (see Upper Fairing Assembly Removal in the Frame chapter).
Remove the canister [A].
Visually inspect the canister for cracks or other damage.
If the canister has any cracks or bad damage, replace it with a new one.
NOTE
The canister is designed to work well through themotorcycle’s life without any maintenance if it is used under normal conditions.
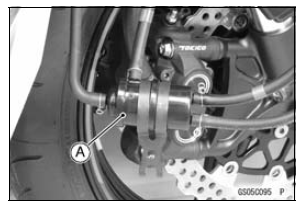
Remove the upper fairing assembly (see Upper Fairing Assembly Removal in the Frame chapter).
Disconnect the hoses from the separator [A].
Visually inspect the separator for cracks and other damage.
If the separator has any cracks or damage, replace it with a new one.
To prevent the gasoline from flowing into or out of the canister, hold the separator perpendicular to the ground.
Check that the hoses are securely connected and clips are in position.
Replace any kinked, deteriorated or damaged hoses.
Run the hoses according to Cable, Wire, and Hose Routing section in the Appendix chapter.
When installing the hoses, avoid sharp bending, kinking, flattening or twisting, and run the hoses with a minimum of bending so that the emission flow will not be obstructed.
 Fuel Hose Inspection (fuel leak, damage, installation condition)
 Cooling System
Troubleshooting Guide
NOTE
Refer to the Fuel System chapter for most
of DFI trouble shooting guide.
This is not an exhaustive list, giving every
possible cause for each problem listed. It
is meant simply as a rough guide to assist
the troubleshooting for some of the more
common difficulties.
Engine Doe ...
Engine No. ZXT00JE003023
1. Heat Insulation Rubber Plate
2. For Air Switching Valve Hoses (Place the air switching valve above the
rubber plate.)
3. For Stick Coils
4. For Throttle Body Assy Holder #2 and #3
5. For Water Temperature Sensor
6. Insert the tab into the slot.
7. For Throttle Body Assy Holder #4
8. ...
Key Registration
Case 1: When the ignition key has been lost or additional
spare ignition key is required.
Prepare a new spare ignition key.
Cut the key in accordance with the shape of the current
ignition key.
Remove the rear seat (see Rear Seat Removal in the
Frame chapter).
Remove the immobilizer/K ...