
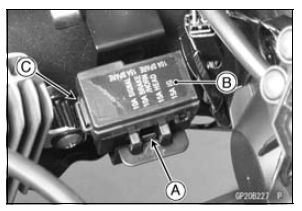
Fuse Box 2
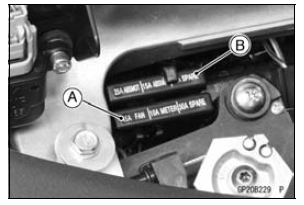
Fuse Box 3 [B] (KIBS Equipped Model)

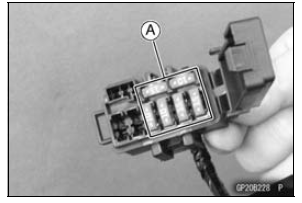
Fuse Installation
If a fuse fails during operation, inspect the electrical system to determine the cause, and then replace it with a new fuse of proper amperage.
 30 A Main/15 A ECU Fuse Removal
 Fuse Inspection
Hub Bearing Removal
Remove the wheels (see Front/Rear Wheel Removal),
and take out the following.
Collars
Coupling (Out of rear hub)
Grease Seals
Use the bearing remover to remove the hub bearings [A].
NOTICE
Do not lay the wheel on the ground with the disc
facing down. This can damage or warp the d ...
Service Code Reading
The service code(s) is displayed on the LCD by the number
of two digits.
NOTE
The service code of the KIBS and ABS adds “b” at the
left side of the code.
The service code of the ESD adds “E” at the left side of
the code.
When there are a number of problems, all the serv ...
Race Mode Display
This mode gives priority to reading
the gear position rather than the
speedometer reading.
The gear position indicator can
be displayed at the position of the
speedometer on the normal mode.
Also the speedometer is displayed instead
of the clock on the normal mode.
This mode can be used ...