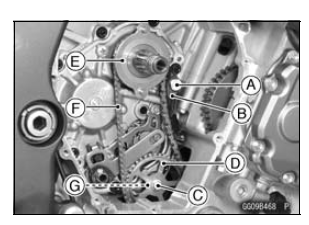

The oil pump drive gear bolt is left-hand threads.

 Oil Pump Installation
 Oil Pump Drive Gear Installation
Exhaust Butterfly Valve Actuator Removal
NOTICE
Never drop the exhaust butterfly valve actuator especially
on a hard surface. Such a shock to the actuator
can damage it.
Remove:
Front Seat (see Front Seat Removal in the Frame chapter)
Clamp [A]
Screws [B] and Washers
Slide the covers [A] and loosen the lock nuts [B] ...
Battery
The battery installed in this motorcycle
is a sealed type, so it is not necessary
to check the battery electrolyte
level or add distilled water.
The sealing strip should not be pulled
off once the specified electrolyte has
been installed in the battery for initial
service.
However, in or ...
Precautions
There are a number of important precautions that are
musts when servicing electrical systems. Learn and observe
all the rules below.
Do not reverse the battery cable connections. This will
burn out the diodes on the electrical parts.
Always check battery condition before condemning other
...