
As the tire tread wears down, the tire becomes more susceptible to puncture and failure. An accepted estimate is that 90% of all tire failures occur during the last 10% of tread life (90% worn). So it is false economy and unsafe to use the tires until they are bald.
If any measurement is less than the service limit, replace the tire (see Tire Removal/Installation in the Wheels/Tires chapter).
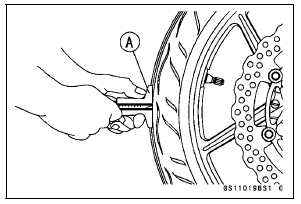
Tread Depth Standard:
Front 3.6 mm (0.14 in.)
Rear 5.3 mm (0.21 in.)
Service Limit:
Front 1 mm (0.04 in.) (AT, CH, DE) 1.6 mm (0.06 in.)
Rear 2 mm (0.08 in.) (Up to 130 km/h (80 mph)) 3 mm (0.12 in.) (Over 130 km/h (80 mph))
| WARNING Some replacement tires may adversely affect handling and cause an accident resulting in serious injury or death. To ensure proper handling and stability, use only the recommended standard tires for replacement, inflated to the standard pressure. |
NOTE
 Wheel/Tire Damage Inspection
 Wheel Bearing Damage Inspection
Engine Stop Switch Operation Inspection
First Step
Set the gear position in the neutral position.
Turn the ignition switch to ON.
Turn the engine stop switch to stop position [A].
Push the starter button.
The engine does not start.
If the engine starts, inspect the engine stop switch (see
Switch Inspection in the Electri ...
Front Forks/Rear Shock Absorber Operation Inspection
Pump the forks down and up [A] 4 or 5 times, and inspect
the smooth stroke.
If the forks do not smoothly or noise is found, inspect the
fork oil level or fork clamps (see Front Fork Oil Change in
the Suspension chapter).
Pump the rear seat down and up [A] 4 or 5 times, and
inspec ...
Rear Wheel Rotation Sensor Removal
NOTICE
The wheel rotation sensor should be handled carefully,
never struck sharply, as with a hammer, or allowed
to fall on a hard surface since the wheel rotation
sensor is precision made. Be careful not to get
water or mud on the wheel rotation sensor.
Do not try to disassemble or repair t ...