
 Upper Inner Fairing Installation
 Center Inner Fairing Installation
Rear Frame Front Removal
Remove:
Rear Frame Rear (see Rear Frame Rear Removal)
Rear Fender Front (see Rear Fender Front Removal)
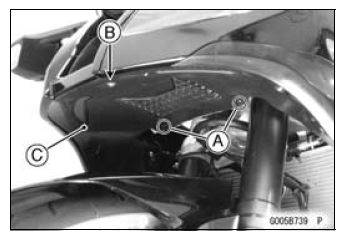
Rear Footpeg Bracket Bolts [A]
Rear Footpeg Bracket [B]
Rear Frame Front Bolts [C]
Left Rear Frame Front [D]
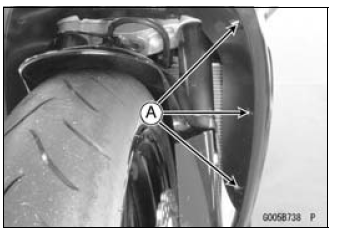
Remove:
Rear Footpeg Bracket Bolts [A]
Rear Footpeg Bracke ...
Front Forks/Rear Shock Absorber Operation Inspection
Pump the forks down and up [A] 4 or 5 times, and inspect
the smooth stroke.
If the forks do not smoothly or noise is found, inspect the
fork oil level or fork clamps (see Front Fork Oil Change in
the Suspension chapter).
Pump the rear seat down and up [A] 4 or 5 times, and
inspec ...
Backups
The ECU takes the following measures to prevent engine damage when the
DFI, ignition, S-KTRC
or immobilizer system parts have troubles.
Note:
(1): D-J Method: When the engine load is light like at idling or low
speed, the ECU determines the
injection quantity by calculating fr ...