
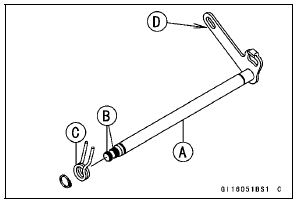
If the shaft is bent, straighten or replace it.
If the serration [B] are damaged, replace the shaft.
If the spring [C] is damaged in any way, replace it.
If the shift mechanism arm [D] is damaged in any way, replace the shaft.
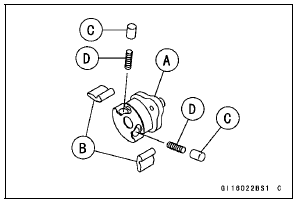
If the ratchet [A], pawls [B], pins [C] or springs [D] are damaged in any way, replace them.
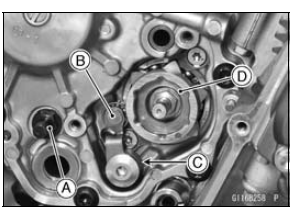
If it is loose, unscrew it, apply a non-permanent locking agent to the threads, and tighten it.
Torque - Shift Shaft Return Spring Pin: 29 N·m (3.0 kgf·m, 21 ft·lb)
If the lever or spring are damaged in any way, replace them.
If they are badly worn or if they show any damage, replace it.
 External Shift Mechanism Installation
 Wheels/Tires
Drive Chain Lubrication Condition Inspection
If a special lubricant is not available, a heavy oil such as
SAE 90 is preferred to a lighter oil because it will stay on
the chain longer and provide better lubrication.
If the chain appears especially dirty, clean it before lubrication.
NOTICE
The O-rings between the side plates seal ...
Sidestand Removal
Raise the rear wheel off the ground with the stand [A].
Remove:
Sidestand Switch Bolt [A]
Sidestand Switch [B]
Remove:
Spring [A]
Sidestand Nut [B]
Sidestand Bolt [C]
Sidestand [D]
...
Sidestand Switch Operation Inspection
Raise the rear wheel off the ground with the stand (see
Rear Wheel Removal in the Wheels/Tires chapter).
Inspect the sidestand switch [A] operation accordance to
below table.
Sidestand Switch Operation
If the sidestand switch operation does not work, inspect
or replace the foll ...